

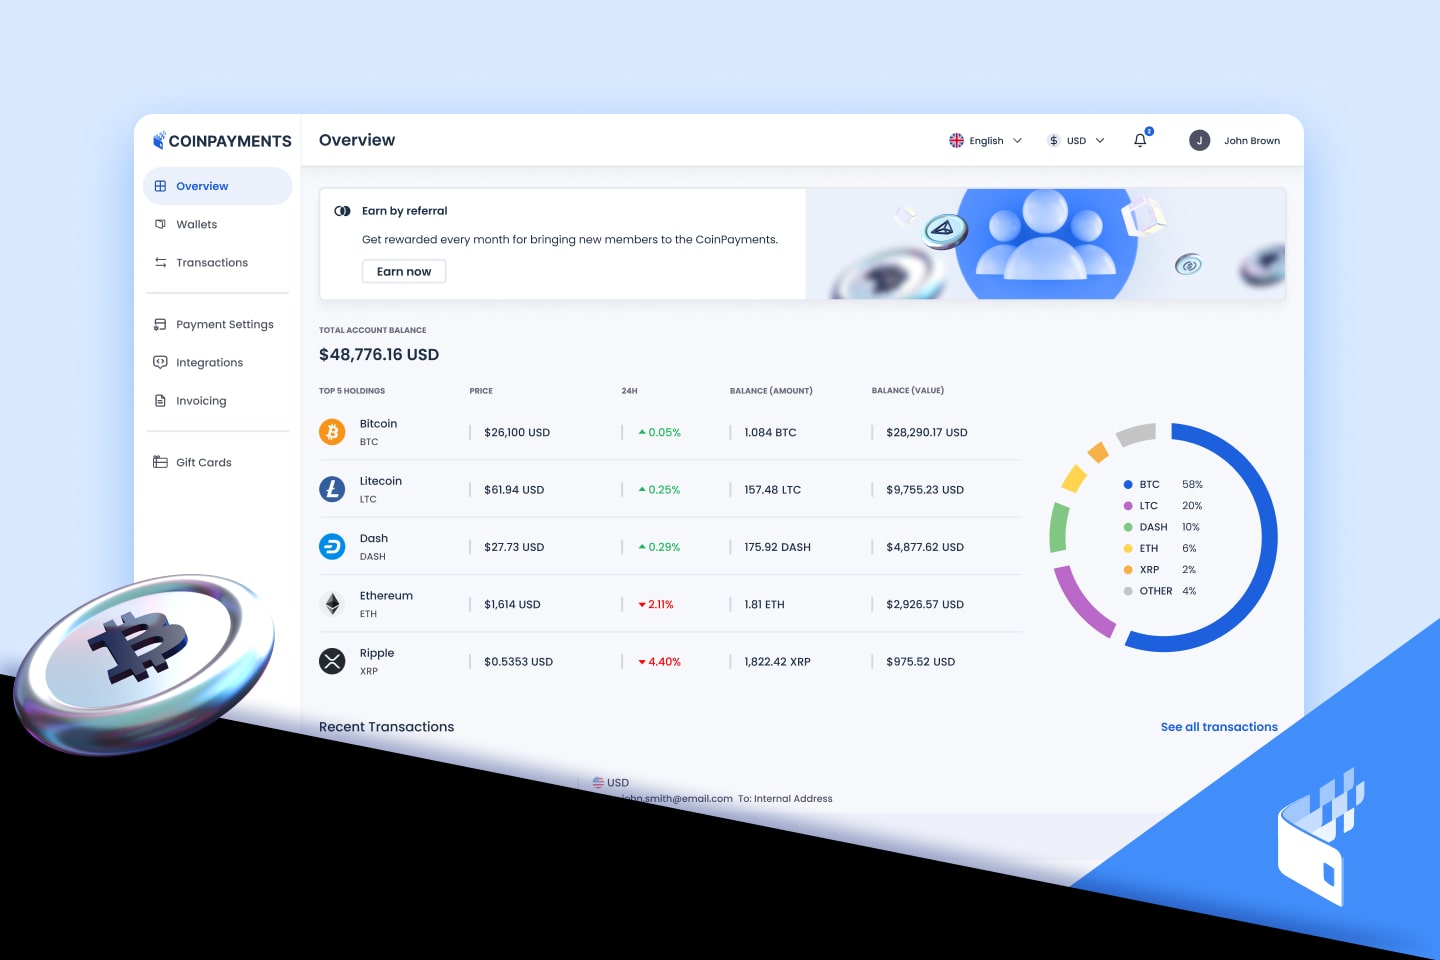
Enable Useful Merchant Payment Features
Now that you have completed your ecommerce store integration setup, you may want to consider using some of the additional convenience features offered through the CoinPayments platform, such as:
- Auto-Sweep
- Auto-Convert & Forwarding
- Fiat Settlement
- Discounts & Mark-Ups
- Secured Vaulting
- $PayByName
These automated features help manage the coins in your account by forwarding balances to other wallets, converting balances to other coins, settling balances to fiat, storing balances more securely, and much more.
Here’s a step-by-step guide on how to set them up:
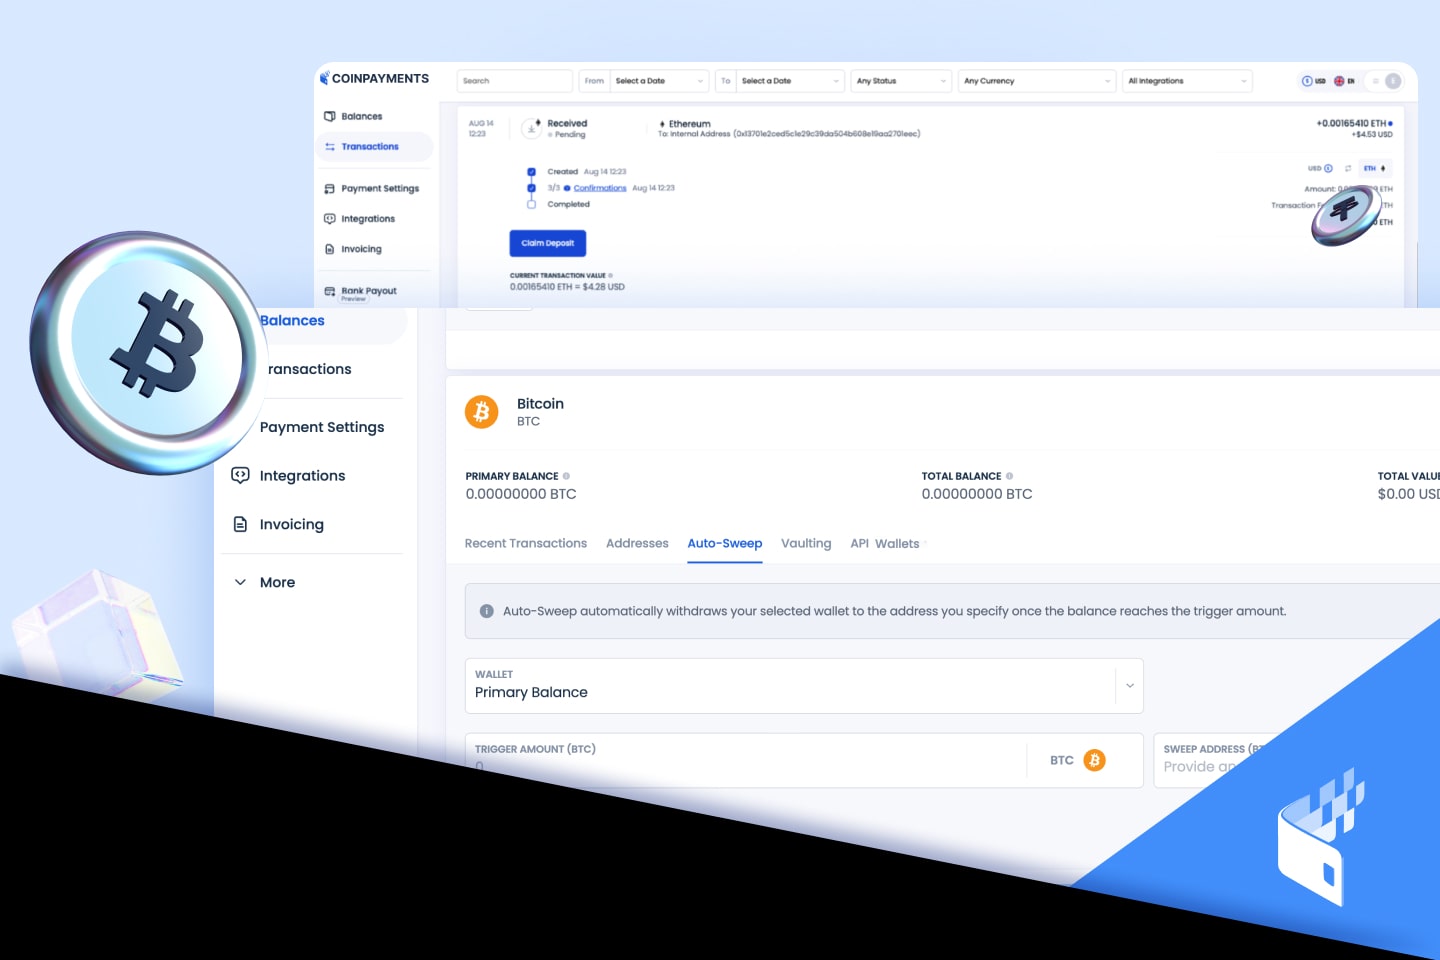
1) Auto-Sweep
The Auto-Sweep feature allows you to automatically withdraw and/or convert your entire balance of a specific coin every night (at approx. midnight EST, GMT-0500).
Once enabled, this feature will allow you to automatically take your entire balance (when above a certain minimum amount set by you) and convert it to another coin (if the conversion pair is supported) and/or send off the CoinPayments platform to any address you specify.
This feature needs to be set up for each coin individually. Conversion is supported for any coin listed on ShapeShift, Changelly or Kyber.
**Please note the conversion feature requires you to generate a new wallet address for the coin you want to convert into (done through the wallets page).
To setup Auto-Sweep:
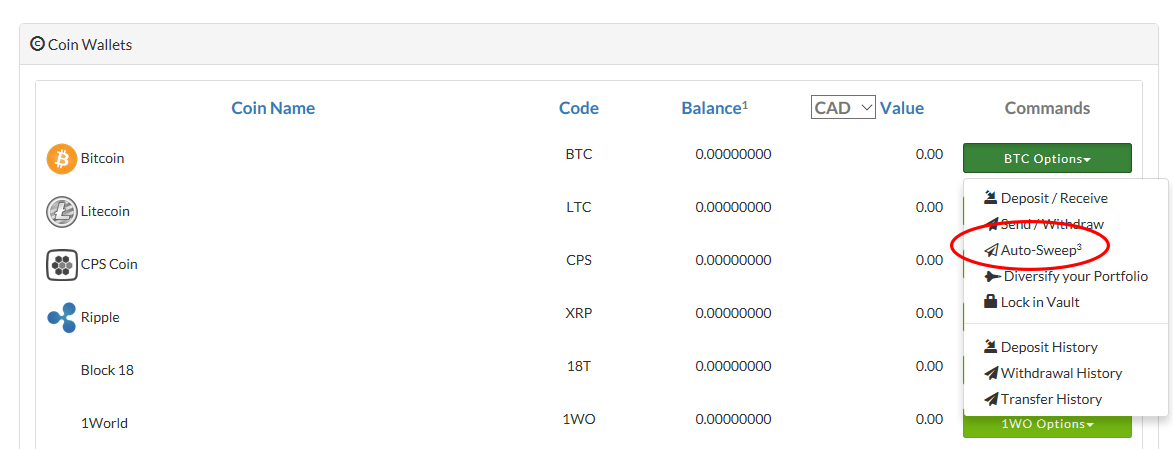
- Login to your CoinPayments account.
- Go to the Your Wallet tab on the dashboard.
- Scroll down to find the wallet of the coin for which you want to setup Auto-Sweep.
- Click the Options button dropdown menu on the right, then click Auto-Sweep. Screenshot: Auto-Sweep Menu
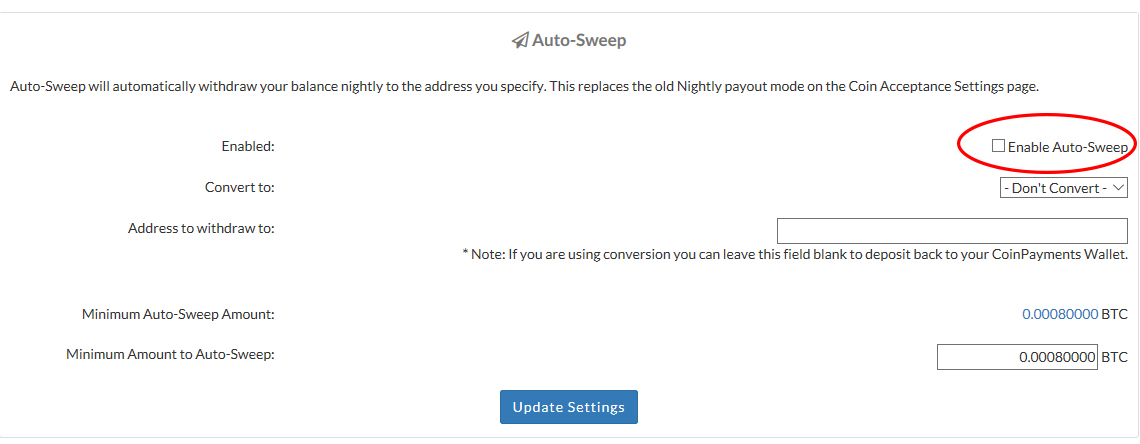
- Click the check box at the top to Enable Auto-Sweep. Screenshot: Auto-Sweep Settings
- Select if you want the coin to be automatically converted before withdrawing.
- Enter the wallet address you want to withdraw to (if converting you can leave blank to send back to the CoinPayments wallet of the converted coin).
- Enter the minimum amount/balance of coin to trigger the Auto-Sweep feature (must be higher than the Minimum Auto-Sweep Amount).
- Click the Update Settings button to save your changes.
2) Auto-Convert & Forwarding
When you receive a payment as a merchant you can (in real-time) have that payment converted into another coin (Auto-Convert) or have that payment forwarded directly to a specified address, typically off the CoinPayments platform (Forwarding).
To set up automatic conversions of a balance of coins every night, please use the Auto-Sweep feature above.
**Please note the conversion feature requires you to generate a new wallet address for the coin you want to convert into (done through the wallets page).
The Auto-Convert feature is handy for merchants looking to accept many different coins as payment, but only wanting to receive and store a specific coin in their wallet.
Both Auto-Convert & Forwarding features are enabled for each individual coin as a Payout Mode option in the Coin Settings tab on the dashboard.
The Payout Mode options are:
- To Balance: Received payments are stored in your CoinPayments wallet for later withdrawal at your leisure.
- ASAP: Received payments are sent to the address you specify as soon as they are received and confirmed.
- Nightly: Received payments are grouped together and sent daily (at approx. midnight EST). Rather than paying sending fees for each transaction (like ASAP), you pay only one sending fee for the entire group.
- To Balance + Convert: Received payments are converted to the selected coin and stored in your CoinPayments wallet. In some cases such as if the amount received is too large to convert at current market volumes you may receive the original currency instead.
- ASAP + Convert: Received payments are converted to the selected coin and sent to the address specified. In some cases such as if the amount received is too large to convert at current market volumes you may receive the original currency instead in your CoinPayments wallet.
To setup Auto-Convert and/or Forwarding:
- When logged into your CoinPayments account, go to the Coin Settings tab on the dashboard.
- Find the coin you want to enable and click the Payout Mode drop down menu beside it. Screenshot: Payout Mode
- Select To Balance + Convert (send converted coins to your CoinPayments wallet) OR select ASAP + Convert (send converted coins to address you specify).
- A new dropdown box will appear below. Select which coin you want to convert the payment into.
- If you selected ASAP + Convert, then enter the address where you want to send the converted coins.
- If you want to Forward the payment only (no conversion), then select ASAP, then enter the address where you want to send the payment.
- Scroll to the bottom of the page and click the Update Coin Preferences button.
3) Fiat Settlement
For convenience and to help remove price volatility, CoinPayments has integrated various fiat settlement services allowing merchants to convert (in real time) their incoming crypto payments into USD, EUR, CNY, AUS and many more. We have Coinmotion integrated to settle into EURO and we have Wyre integrated to settle into 9 different fiat currencies.
4) Discounts & Mark-Ups
CoinPayments has a built-in feature allowing merchants to set discounts or mark-ups on payments for specific coins.
For example, you can offer a 10% discount on checkout when paying with Dogecoin or you can add a mark-up of 0.5% to cover our processing fee (or higher to cover conversion fees) when customers pay with a specific coin. The flexibility is available to allow you to customize the discount or mark-up however you want.
To set Discounts or Mark-Ups:
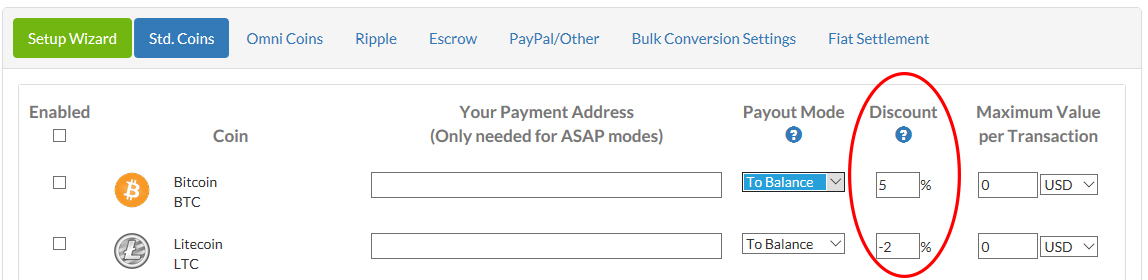
- Log into your CoinPayments account and go to the Coin Settings tab on the dashboard.
- Find the coin you want to enable this feature for and enter a percentage amount for the Discount or Mark-Up. Screenshot: Discount and Mark-Up
- Enter a positive number to provide a Discount for the customer when paying in this specific coin.
- Enter a negative number to add a Mark-Up for the customer when paying in this specific coin.
- Scroll to the bottom of the page and click the Update Coin Preferences button.
5) Secured Vaulting
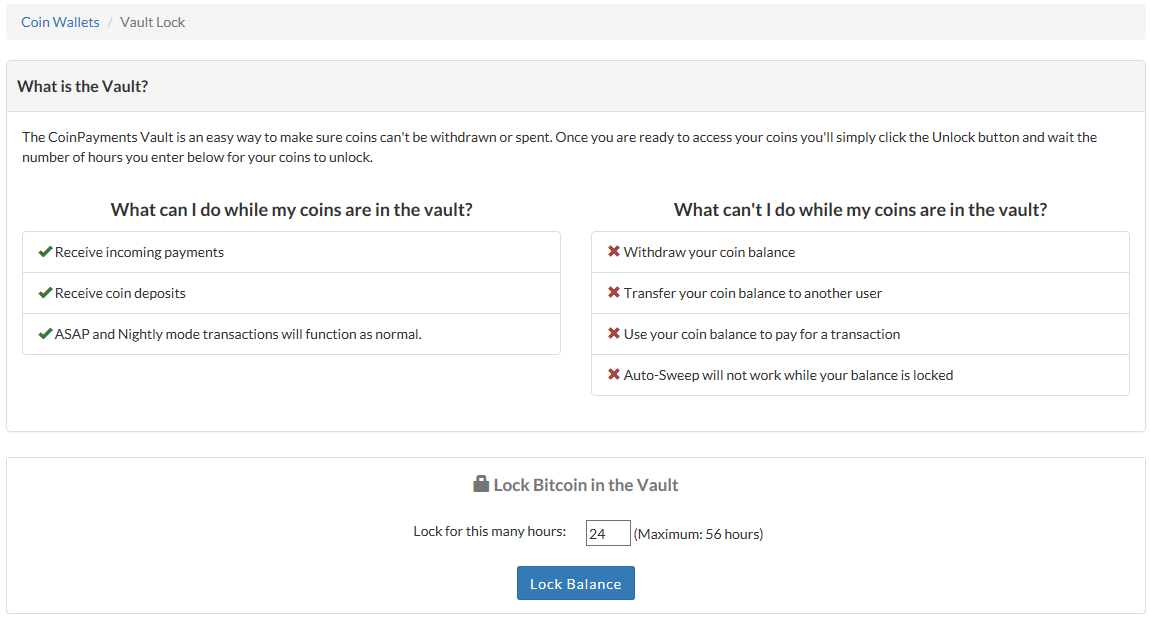
The Lock in Vault feature adds an additional layer of security to your account by placing a time-release lock on specific coin wallets.
Once enabled, the entire balance of a specific coin can’t be withdrawn, transferred, converted, or used in any way until unlocked. You can still receive payments and deposits without interruption.
Once you unlock your coins from the vault, you have to wait the pre-specified amount of time before getting access to your locked coins again.
This additional security feature will notify you by email when unlocked, providing you with enough time to contact us in case your account has been breached.
To lock coins in the vault:
- Login to your CoinPayments account and go to the Your Wallet tab on the dashboard.
- Scroll down to find the wallet of the coin for which you want to lock in the vault.
- Click the Options button dropdown menu on the right, then click Lock in Vault.
- Read through the full list of what you can and can’t do while your coins are locked. Screenshot: Lock in Vault
- Enter the amount of time you wish to have the coins locked once they are released (the default is 24 hours).
- Click the Lock Balance button to complete the vaulting process.
6) Customizable Wallet Addresses & $PayByName
$PayByName
$PayByName is a feature on CoinPayments that provides one unique and convenient $tag to receive payments from all coins.
Instead of having to input a destination wallet address for a specific cryptocurrency, the sender can instead use the receiver’s $PayByName, allowing the recipient of the transaction to receive ANY coin supported by CoinPayments to their one unique $PayByName.
This feature can only be used when the sender and receiver are both using CoinPayments for the transaction.
All $PayByName name tags are prefixed by the $ symbol. For example, CoinPayments’ own tag is $CoinPayments.
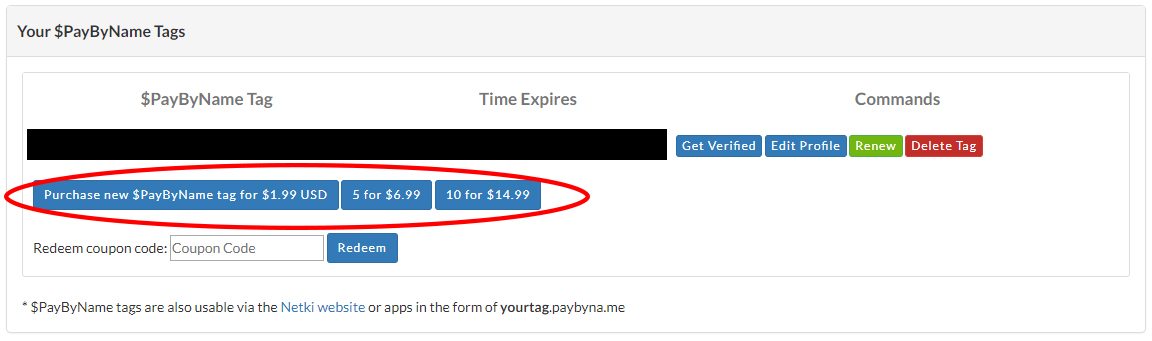
A $PayByName tag can be purchased through the CoinPayments platform for $1.99 USD and lasts for 1 year.
To purchase a $PayByName:
- Login to your CoinPayments account and go to the$PayByName tab on the dashboard or in the navigation menu.
- Select to purchase 1, 5 or 10 $PayByName tags. Screenshot: $PayByName Purchase
- Click the shopping cart payment button in the Redirect box.
- Enter First Name, Last Name and select which coin you want to use for payment then click the Complete Payment button.
- You will be redirected to the payment screen to send your payment to address provided.
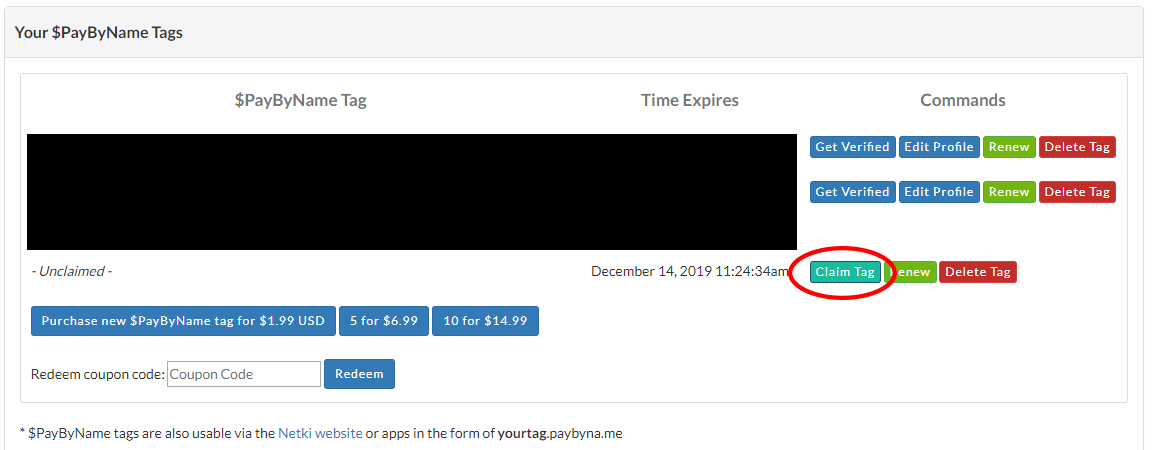
- When payment completes, go back to the$PayByName page and you should see a new “Unclaimed” $PayByName tag.
- Click the Claim Tag button. Screenshot: PayByName Tag List
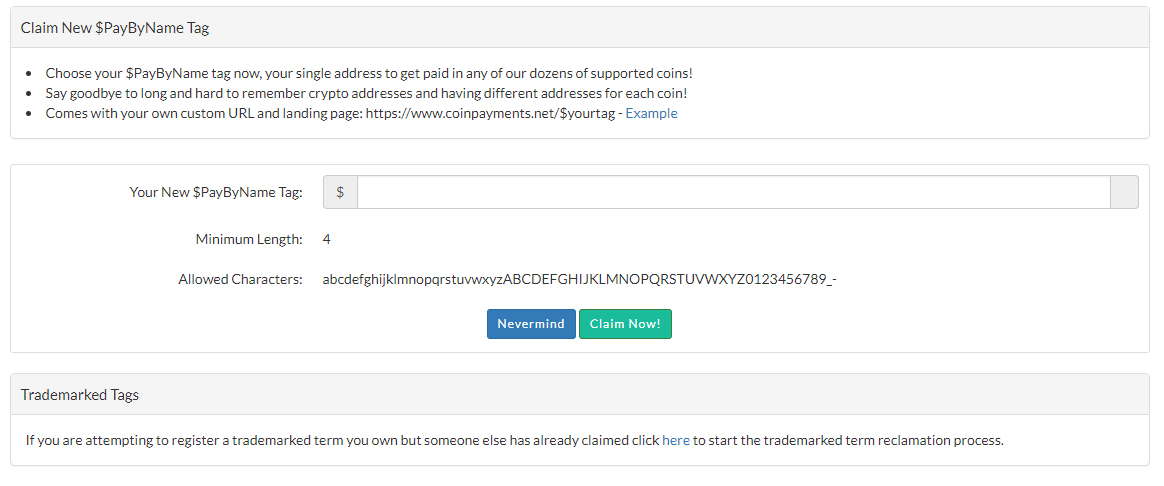
- Enter your new $PayByName tag and click the Claim Now! Button. Screenshot: Claim PayByName Tag
- If the tag is available you will be redirected back to the $PayByName page where it will show the expiry date.
- You can now provide this $PayByName tag to other CoinPayments users to receive payments in any coin supported by CoinPayments!
Click here for more details about $PayByName.
Unstoppable Domains
CoinPayments teamed up with Unstoppable Domains to enable users to simplify their wallet addresses.
You can replace your long and complicated wallet address with a domain name of your choice. Choose any name you want, and receive cryptocurrency securely.
Get your own [NAME].crypto domain by using this affiliate link.
FIO Protocol
CoinPayments’ FIO Protocol integration is another way for users to send/receive crypto without long wallet addresses. Instead, all they have to do is enter a simple, human-readable FIO Crypto Handle (e.g., cryptofan@hodl) at checkout.
Learn more about the FIO Protocol integration and how to set it up by watching this video.