CoinPayments Integration Guide Steps
- Step 1: Account Setup
- Step 2: Integration
- Step 3: Additional Features
- Step 4: Testing Your CoinPayments Integration
- Step 5: Integration Use-Cases
Overview of Step 3: Additional Features
Now that your CoinPayments account is operational, you can leverage more features to manage your crypto assets effectively. By the end of this guide, you will be able to use the following features to optimize asset management and security:
- Recover Assets: Recover assets sent to the wrong address within the same blockchain.
- Auto-Sweep: Automate withdrawals or conversions when your wallet reaches a specified balance.
- Secured Vaulting: Add a time-release lock on specific wallets for enhanced security.
- Transaction History
- Webhook History
- Fiat Settlement (TBD)
These tools are designed to simplify your crypto operations while ensuring your funds are secure and accessible.
Recover Assets
Mistakenly sending assets to the wrong address can be a common issue, but CoinPayments offers a self-service solution to recover such assets sent to the wrong address for all tokens within the SAME blockchain. The feature allows for automatic or manual handling of recovery and is available ONLY for deposits to merchant addresses.
Example:
If you provide an ETH address to customers for deposits and a customer accidentally sends USDT.ERC20 to this address, CoinPayments will treat this as a mistake because token balances and native coin balances are managed separately. The system identifies the deposit’s currency and automatically forwards the funds to your USDT primary balance. This ensures that assets are not lost due to address mismatches. Here’s how to set up the feature:
Set Up Automatic Handling
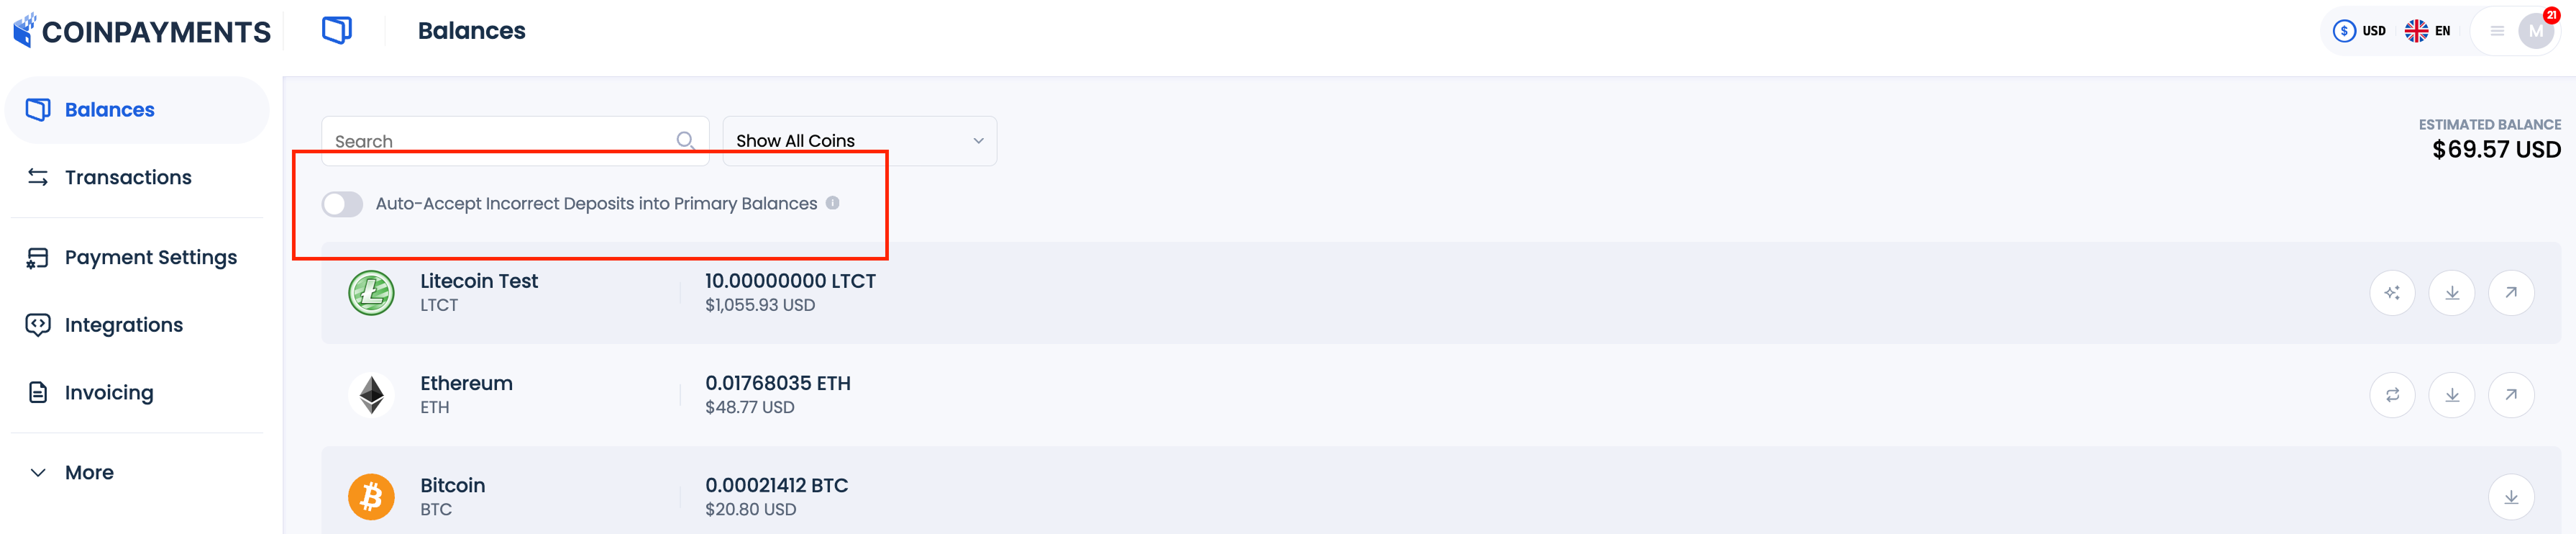
- Activate Auto-Accept for Incorrect Deposits:
- Go to the Balances tab and turn on the Auto-Accept Incorrect Deposits into Primary Balances toggle.
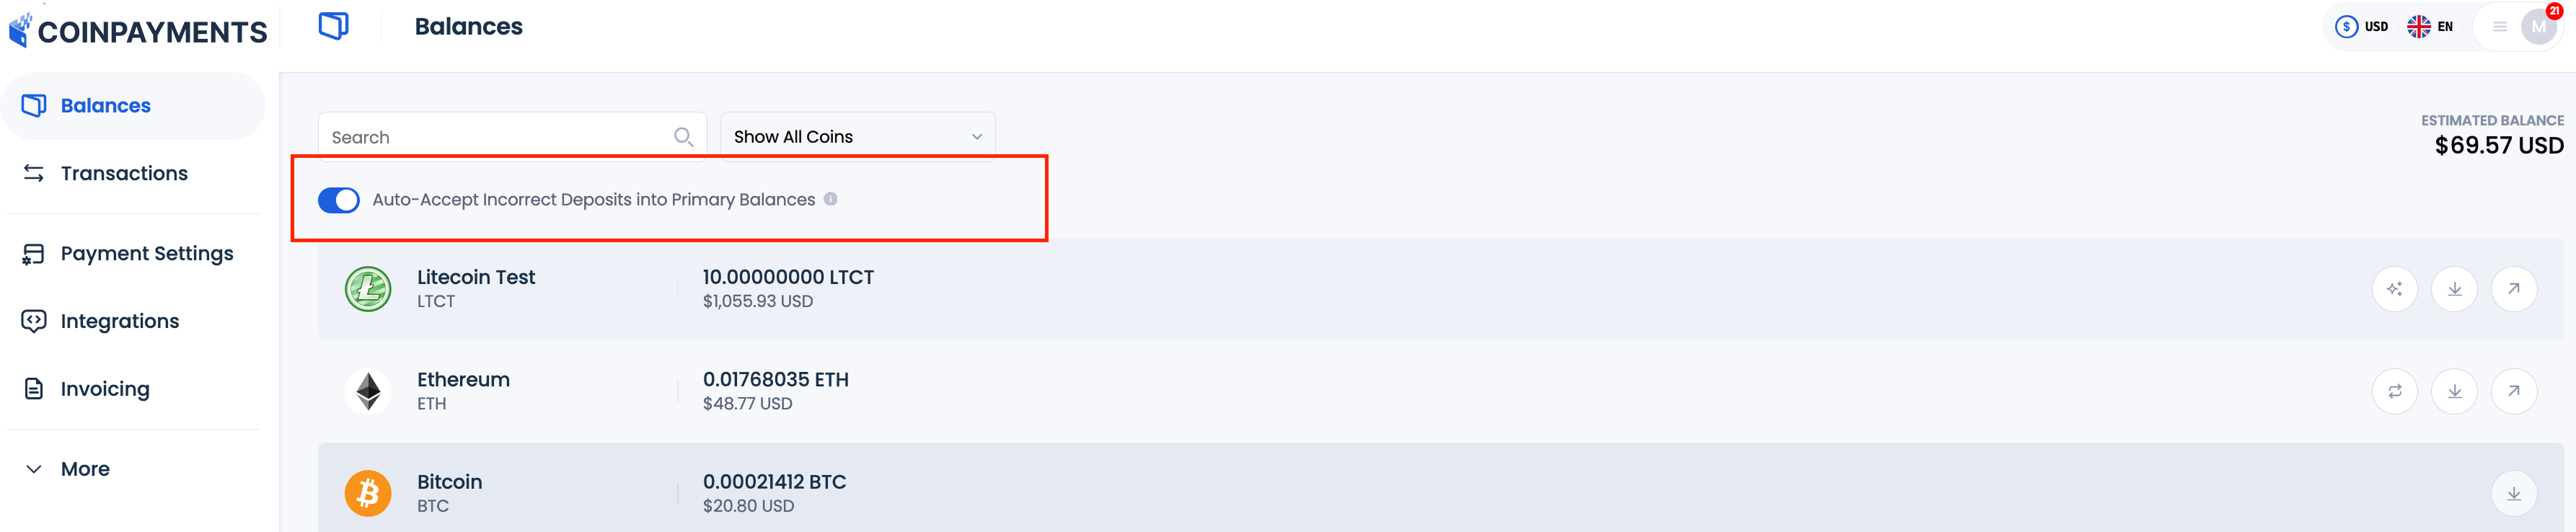
- Once an erroneous deposit is detected, CoinPayments identifies the currency being sent and forwards the funds to your primary wallet for that currency.
- The transaction will appear in your Transaction History as a successful deposit.
If a customer sends USDT to your ETH address, the system will redirect the funds to your USDT main wallet, and this will be recorded as a successful deposit.
Set Up Manual Handling
For greater control over how erroneous deposits are managed, you can opt for manual handling. This allows you to review flagged transactions and decide whether to claim the funds.
- Deactivate Automatic Handling:
- Go to the Balances tab and turn off Auto-Accept Incorrect Deposits into Primary Balances toggle.
- When an erroneous deposit is detected, CoinPayments identifies the currency and marks the transaction as Pending in your Transaction History.
- Example: If a customer sends USDT.ERC20 to your ETH address, the system will flag this deposit as pending in your USDT main wallet.
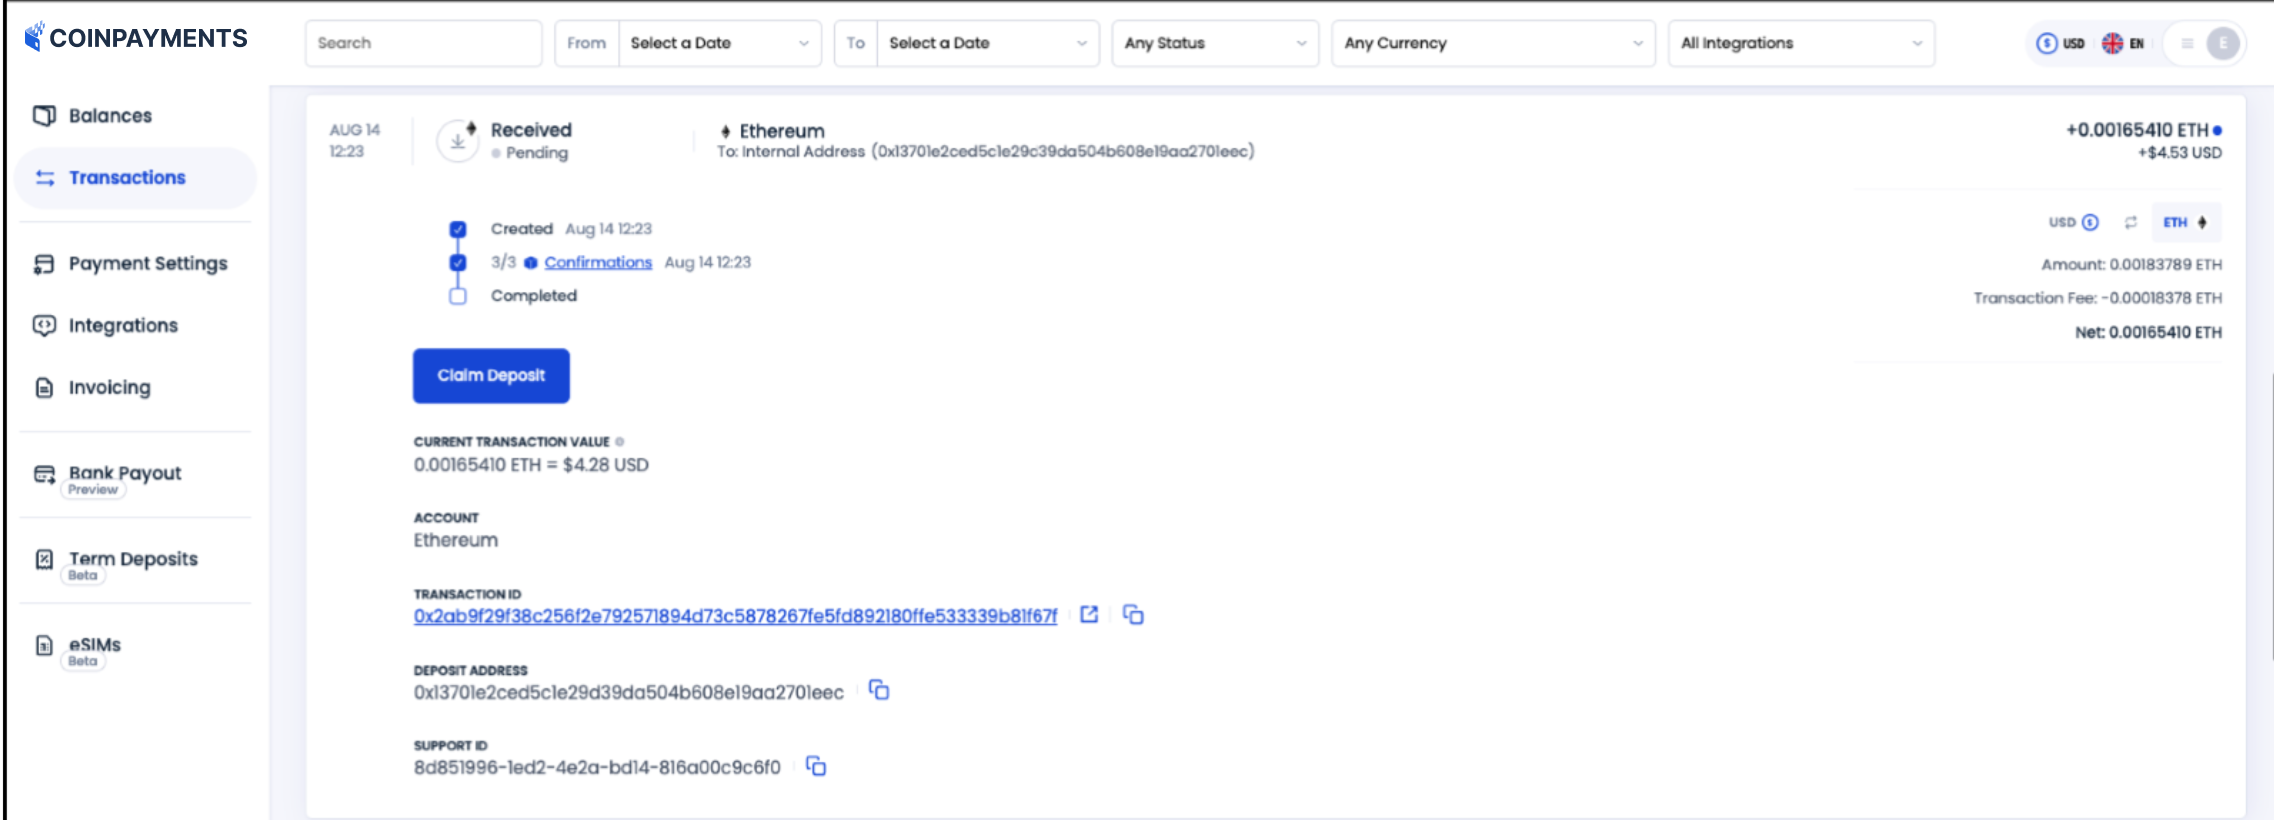
- Claiming the Deposit:
- Open the flagged transaction in your Transaction History.
- Click Claim Deposit to transfer the funds to your primary wallet for the detected currency.
Note: CoinPayments charges a handling fee of approximately 1% for processing erroneous transactions, and the net amount credited to your wallet will reflect this deduction.
Auto-Sweep
The Auto-Sweep feature allows you to automatically withdraw and/or convert the entire balance of a specific coin wallet once it reaches a designated balance level.
Once enabled, it is a convenient tool for automating asset management and ensuring your funds are transferred or converted without manual intervention.
This feature needs to be set up for each coin individually.
Key Features
- Automatically withdraw balances that exceed a specified minimum amount.
- Convert funds to another cryptocurrency if the destination address is for a different coin e.g. receive Bitcoin, convert automatically to USDT.
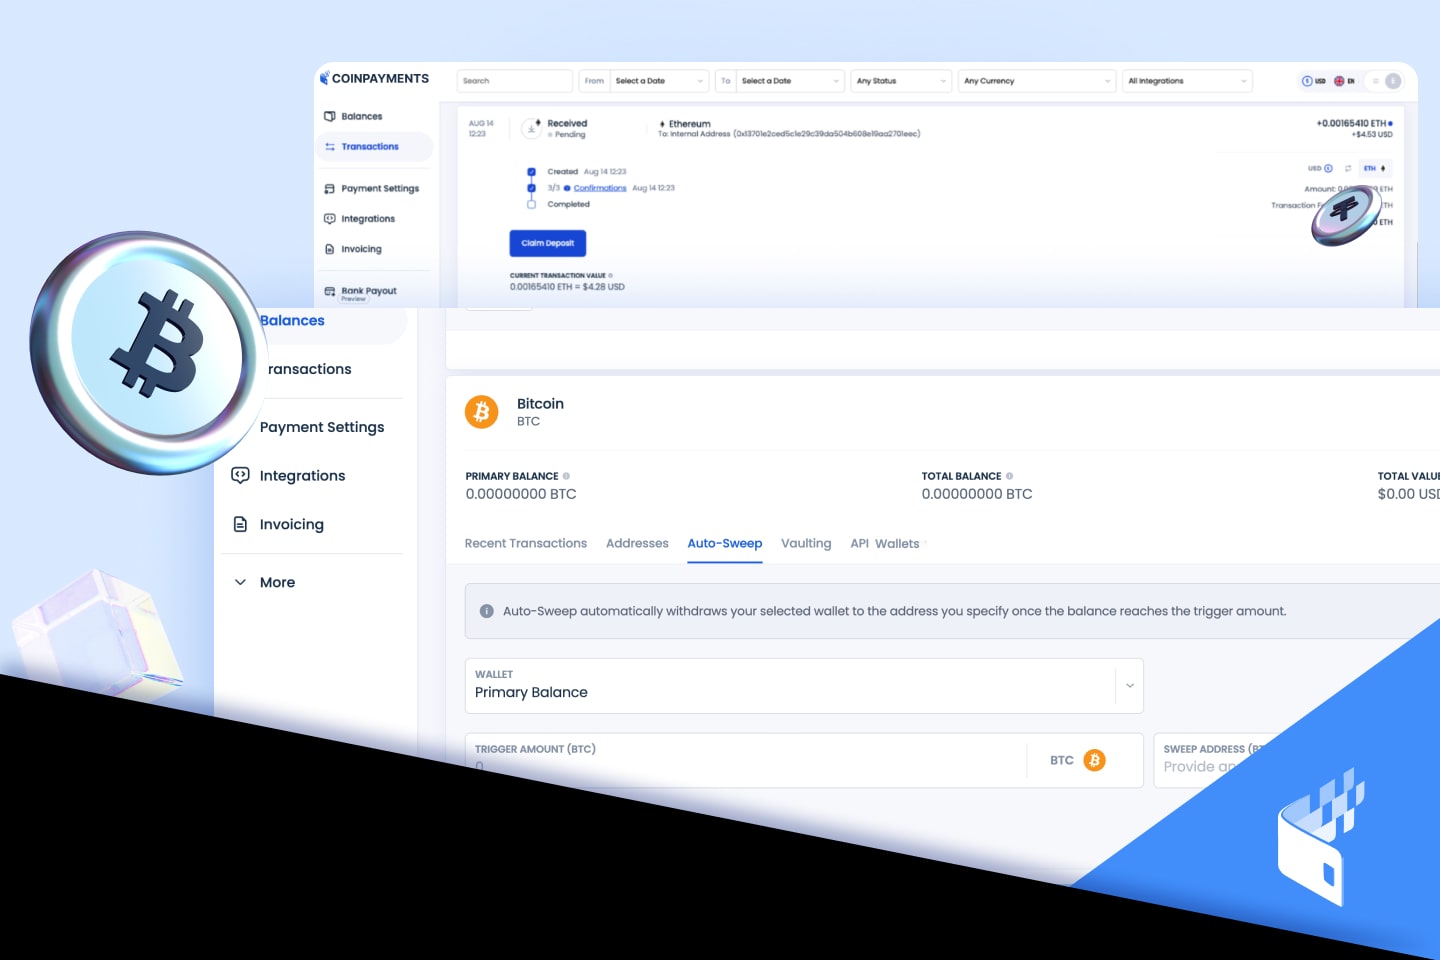
How to Set Up Auto-Sweep
- Locate and Open Auto-Sweep Settings:
- Go to the Balances tab on your CoinPayments dashboard.
- Scroll down to locate the wallet of the coin for which you want to enable Auto-Sweep.
- Click on the coin wallet to open its settings.
- Select the Auto-Sweep tab within the wallet’s settings.

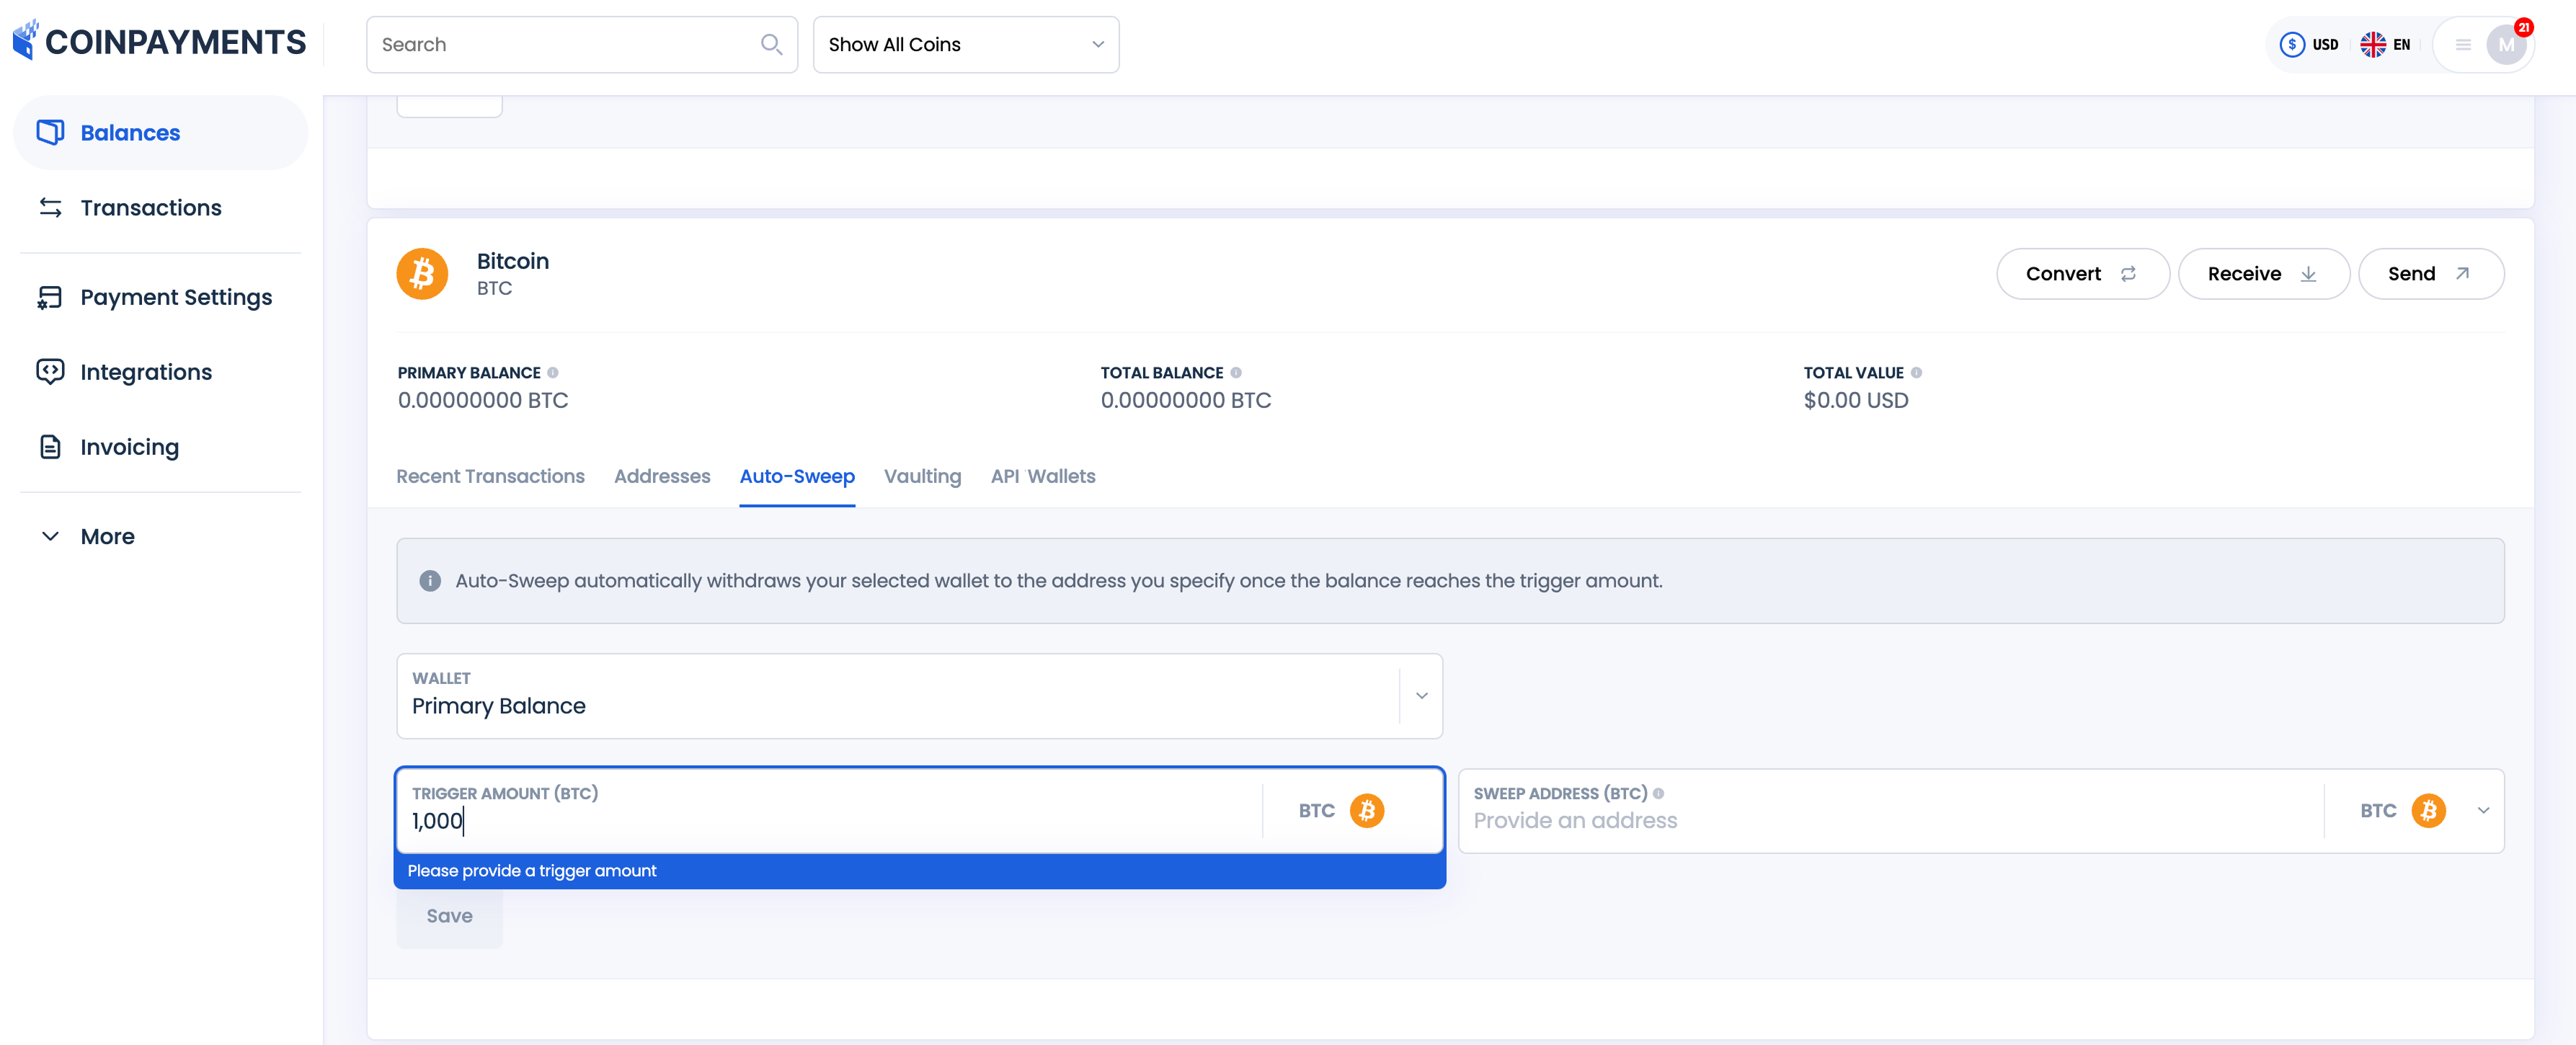
- Configure the Auto-Sweep Settings:
- Choose the wallet to Auto-Sweep from. By default, this will be the Primary Balance.

- Set a Trigger Amount:
- Enter the minimum balance level that will trigger the Auto-Sweep
- Enter the minimum balance level that will trigger the Auto-Sweep
- Choose the Destination Wallet/Address:
- Select the wallet or address where the funds will be sent.
- If the destination wallet is for a different cryptocurrency, the funds will be automatically converted.
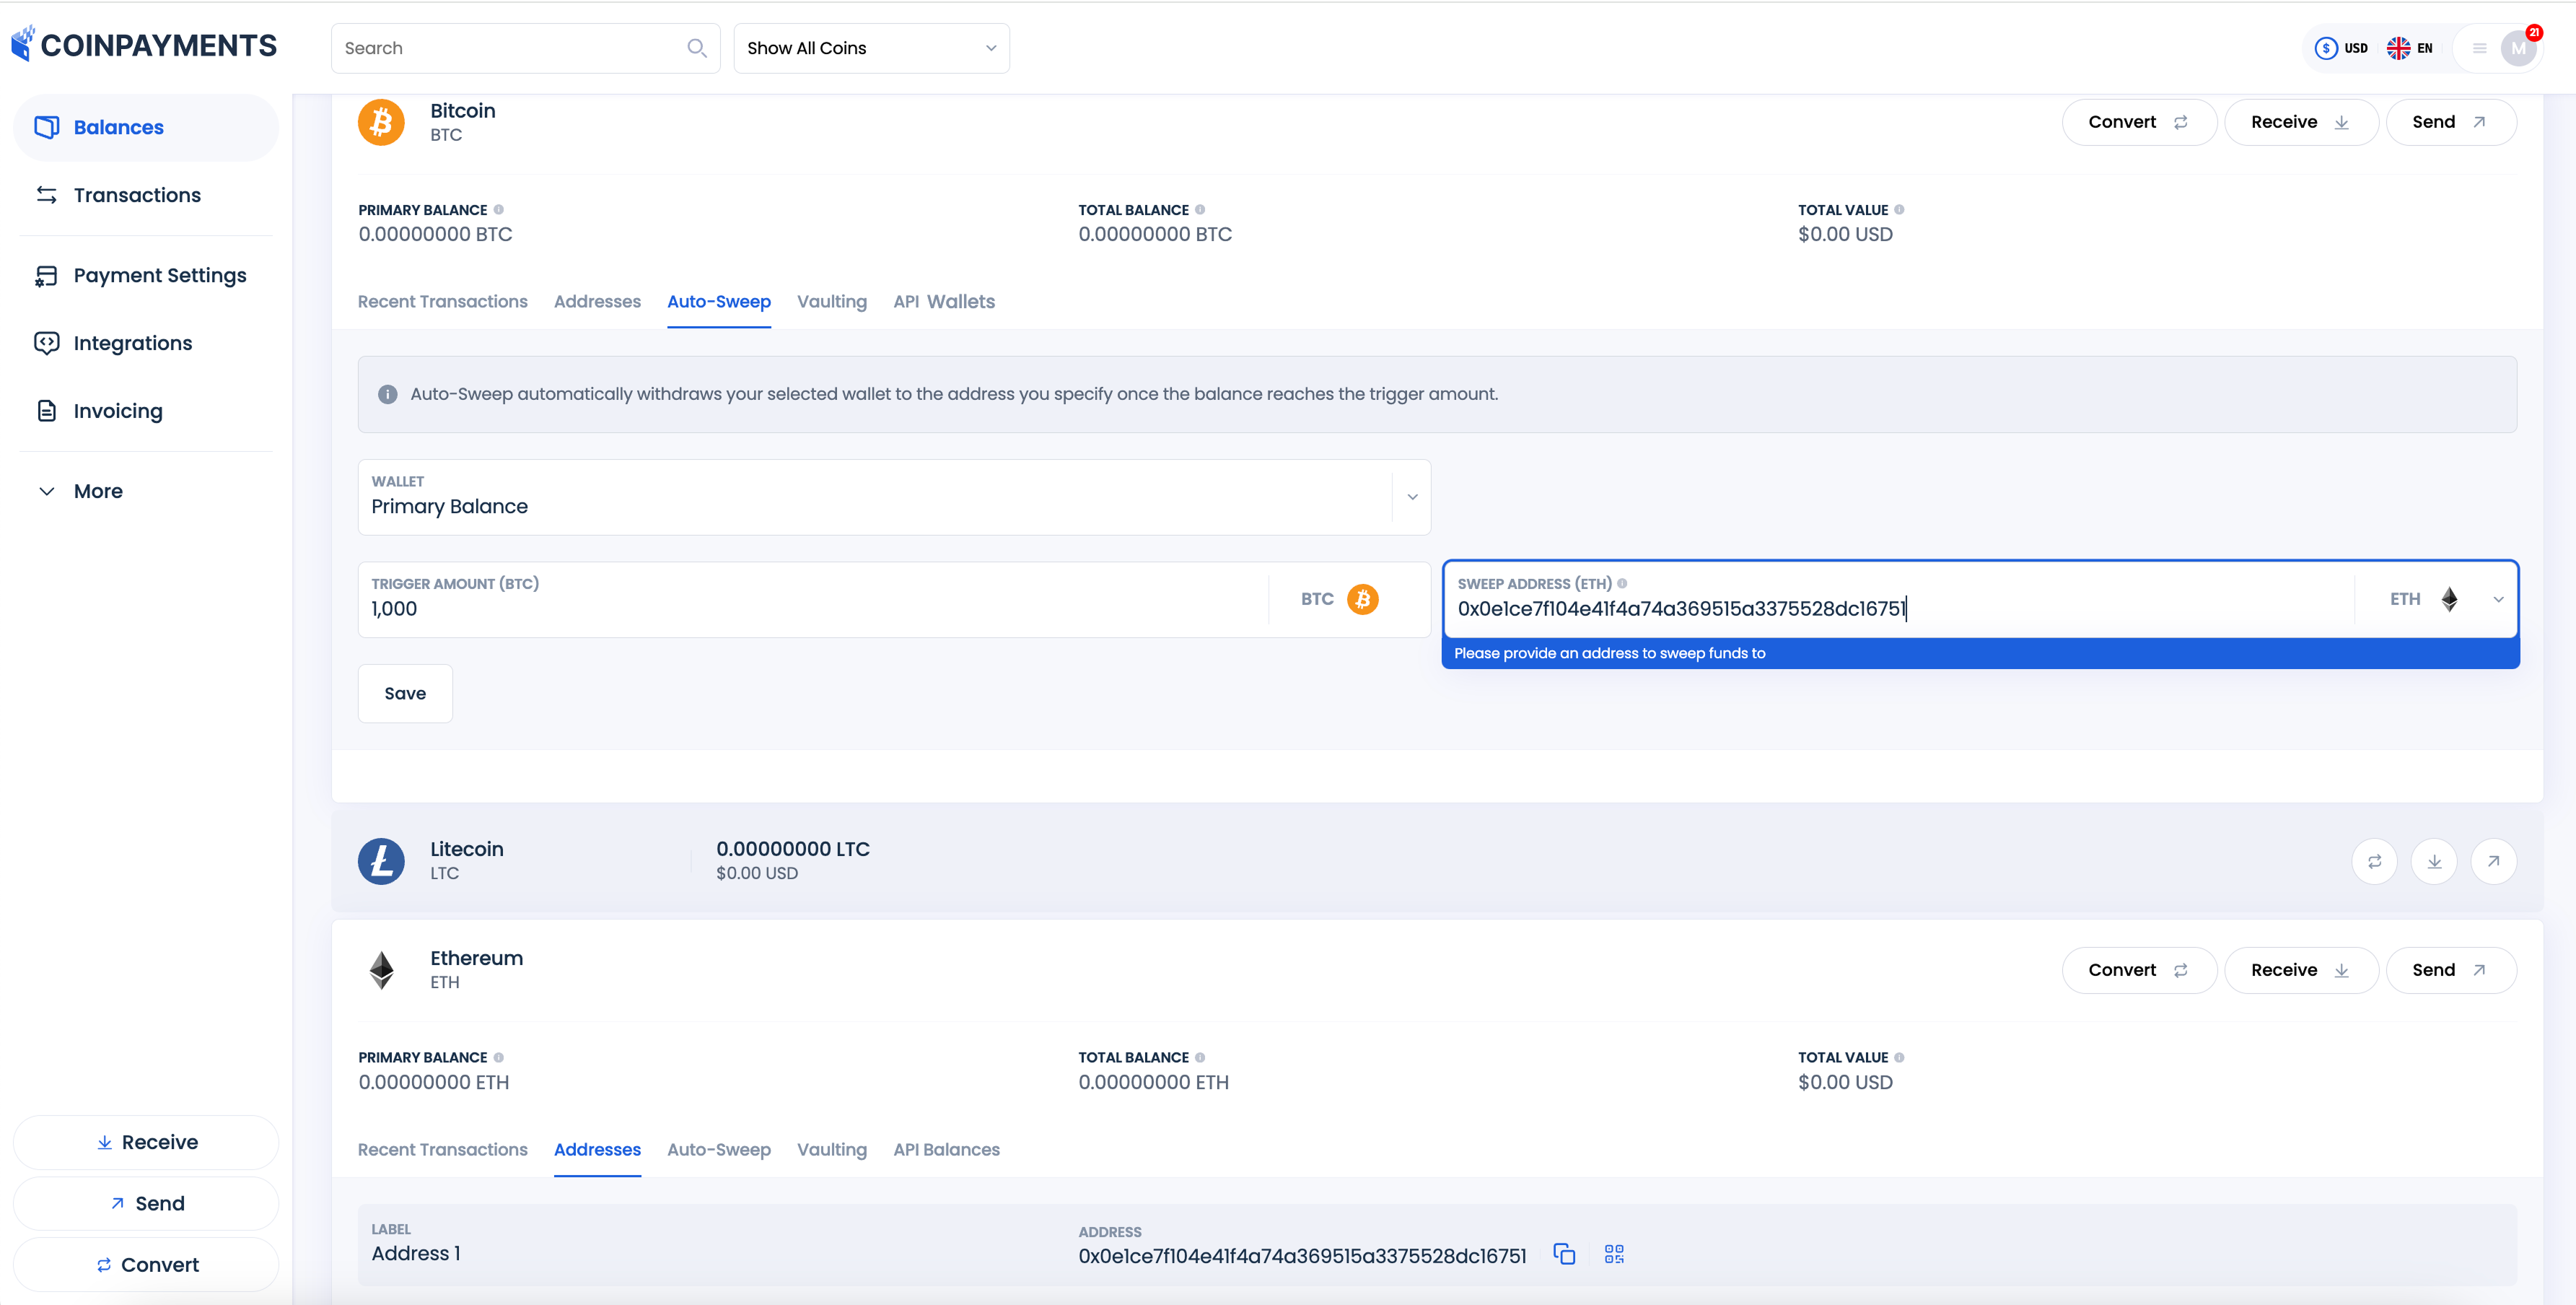
Note: In case of conversion, you need to generate a new wallet address for the coin you want to convert into (e.g. for auto-sweep from BTC to ETH, you need to create an ETH address where converted funds will auto-sweep from the BTC wallet). You can create a new address for the destination coin for auto-sweep from the Balances tab.
- Save and Confirm:
- Click the Save button to apply your settings.
- Confirm the changes using your two-factor authentication (2FA) method.
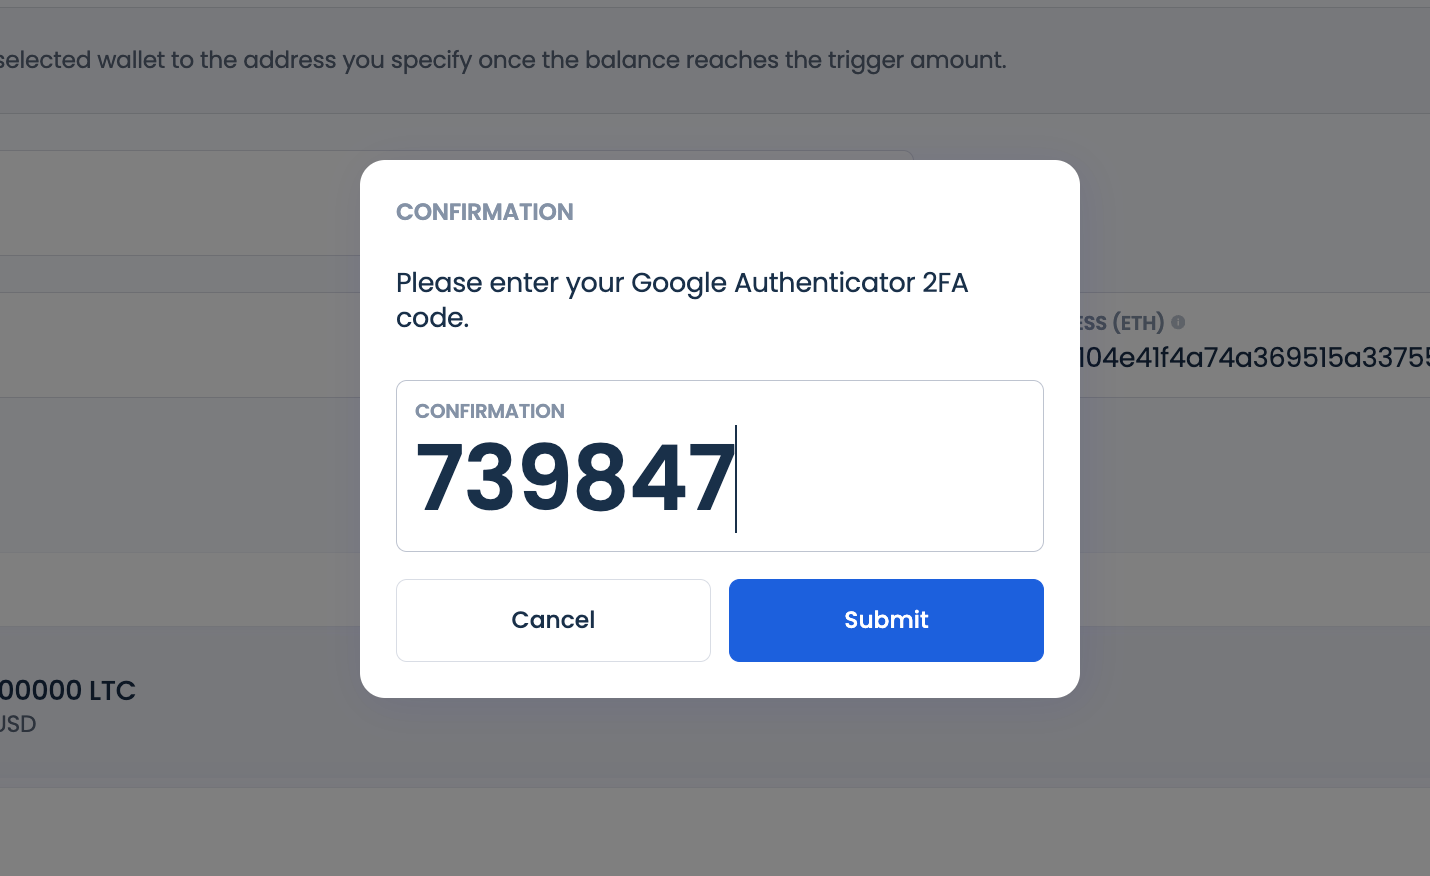
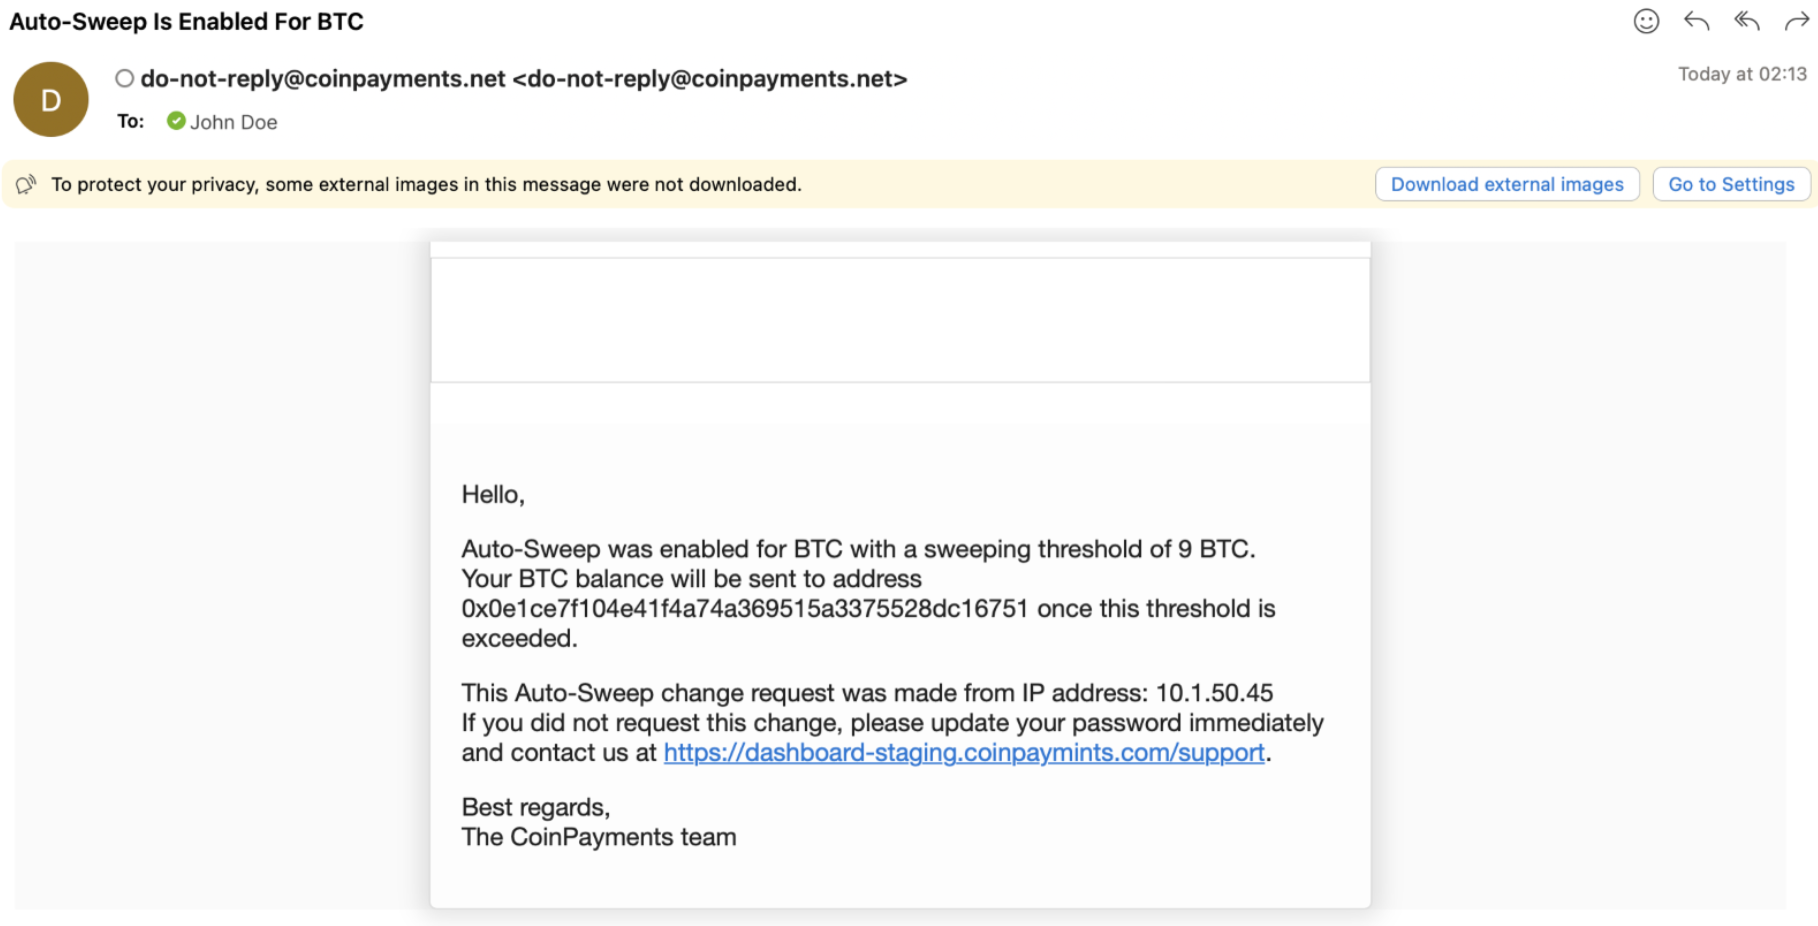
- A confirmation email will be sent to your registered email address immediately after setup.
Secured Vaulting
The Vaulting feature provides an additional layer of security for your CoinPayments account by placing a time-release lock on specific coin wallets. This ensures that the balance in the locked wallet cannot be withdrawn, transferred, converted, or used in any way until it is unlocked.
Key Features
- Restricted Access: While locked, your coins cannot be accessed or used, but payments and deposits to the wallet remain uninterrupted.
- Time-Release Lock: Once unlocked, a pre-specified delay (up to 56 hours) must pass before access is granted.
- Email Notifications: You’ll receive an email notification when the lock is removed, giving you time to take action if your account has been compromised.
How to Lock Coins in the Vault:
- Locate and Open the Vaulting Tab:
- Go to the Balances tab on your CoinPayments dashboard.
- Scroll down to find the wallet of the coin you wish to lock in the vault.
- Click on the coin wallet to open its settings and select the Vaulting tab.
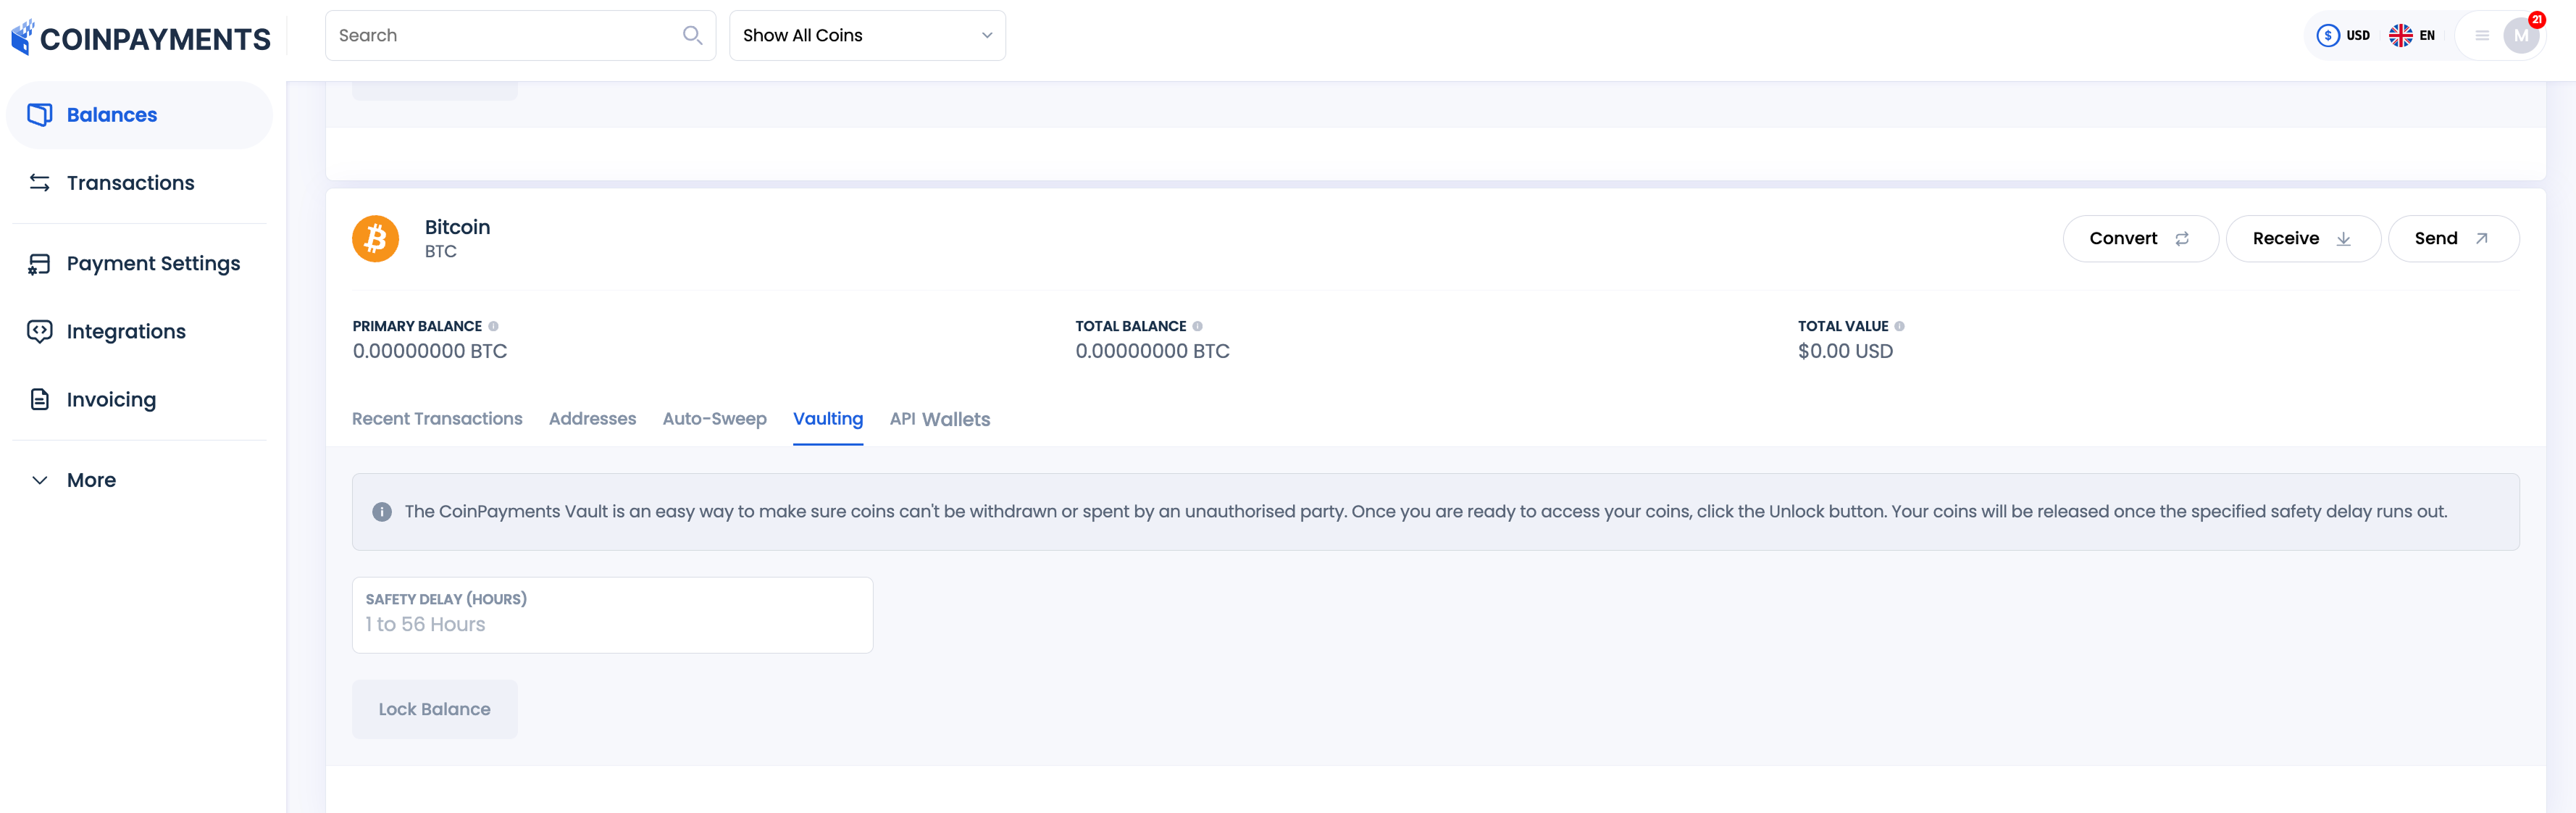
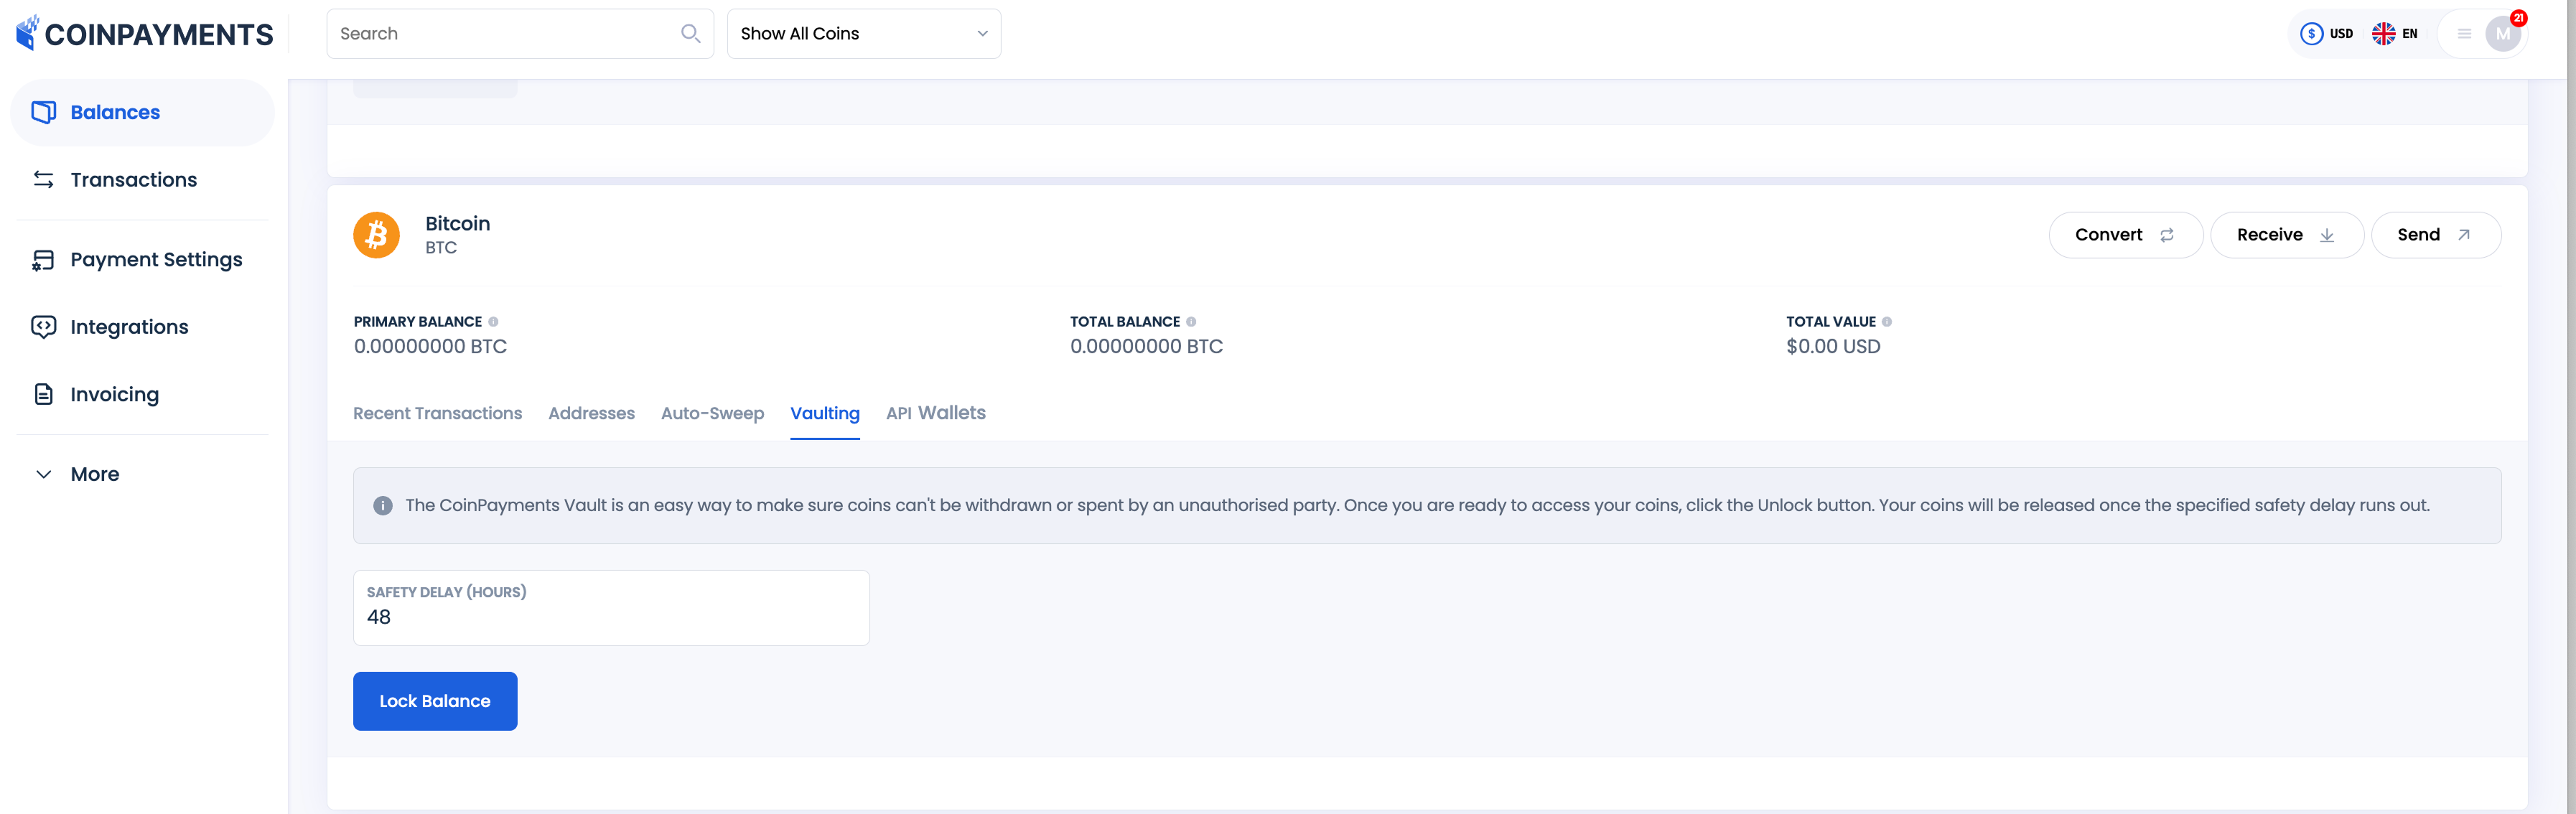
- Set the Lock Duration:
- Enter the amount of time (up to 56 hours) you wish to lock the coins after they are released.
- Click Lock Balance.
- Review Vaulting Terms:
- Read through the list of actions that are restricted while your coins are locked.
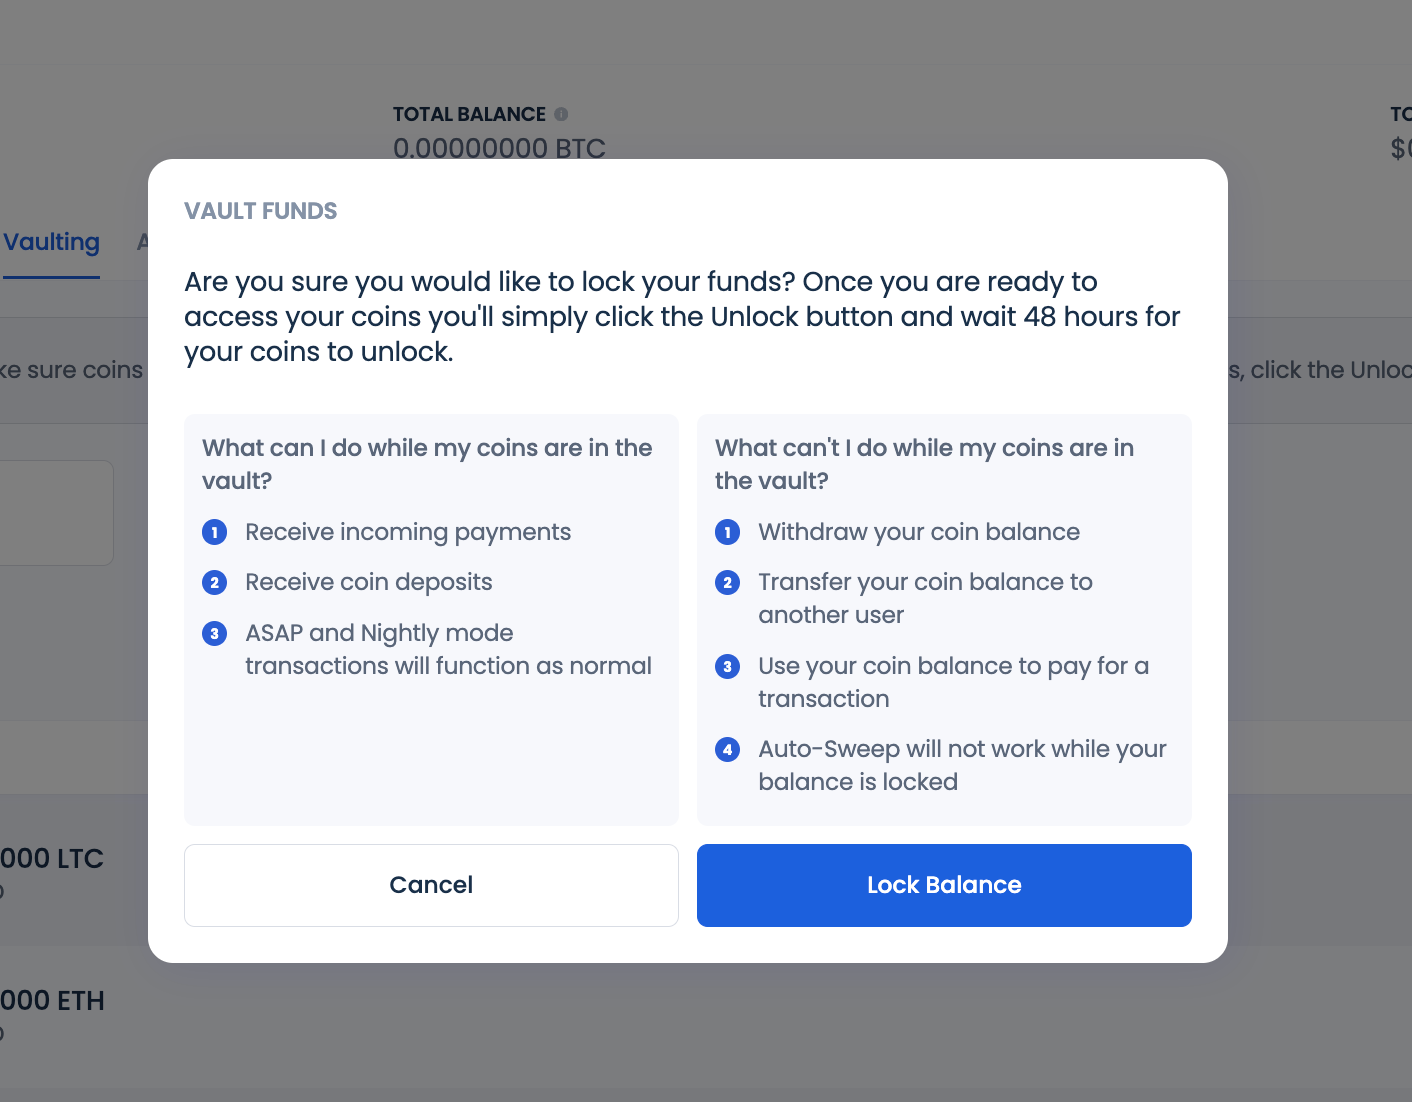
- Confirm and Complete:
- Click the Lock Balance button to finalize the vaulting process.
Important Notes
- Vaulting is a proactive measure to prevent unauthorized access or movement of funds in case of a breach.
- You cannot cancel or adjust the lock duration once it is set until the specified time passes.
- Use this feature for high-security wallets or funds not required for immediate transactions.
Transaction History
The Transaction History feature allows you to review all incoming and outgoing transactions within your account. This includes deposits, withdrawals, conversions, and payments for goods and services. It provides a comprehensive record of your account activity, ensuring transparency and accountability.
To access the feature in the main dashboard menu navigate to the Transactions tab.
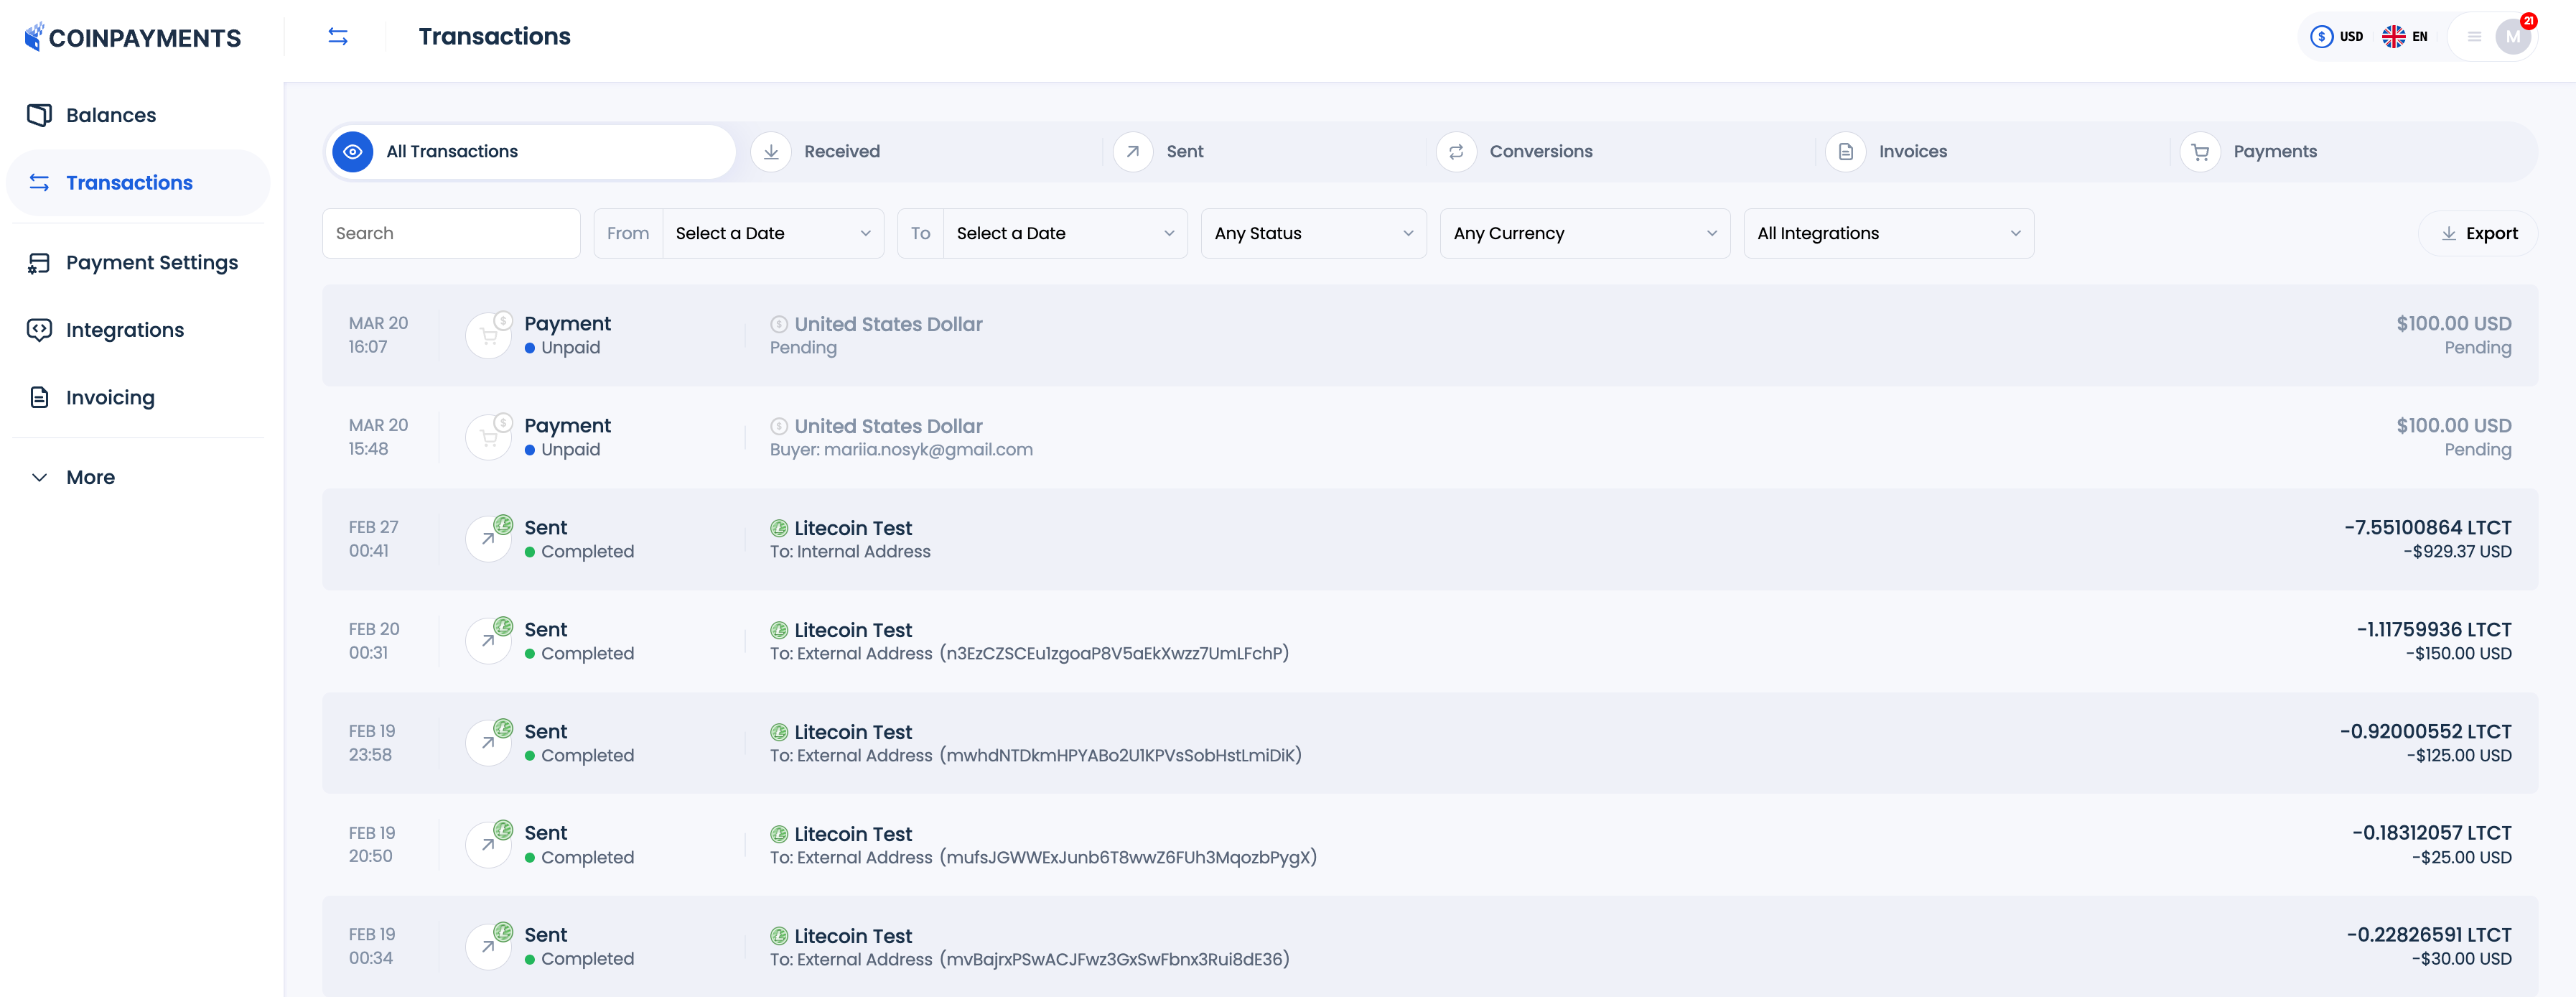
Transaction Types
CoinPayments Transaction History tracks the following types of transactions:
- Received: Deposits sent to primary balances or API wallets/addresses.
- Sent: Withdrawals from primary balances or API wallets/addresses.
- Conversion: Currency conversions performed between currencies activated for your account.
- Invoice: Payments for invoices created using the Invoice Builder.
- Payment: Payments made via payment buttons, plugins, or API-generated invoices.
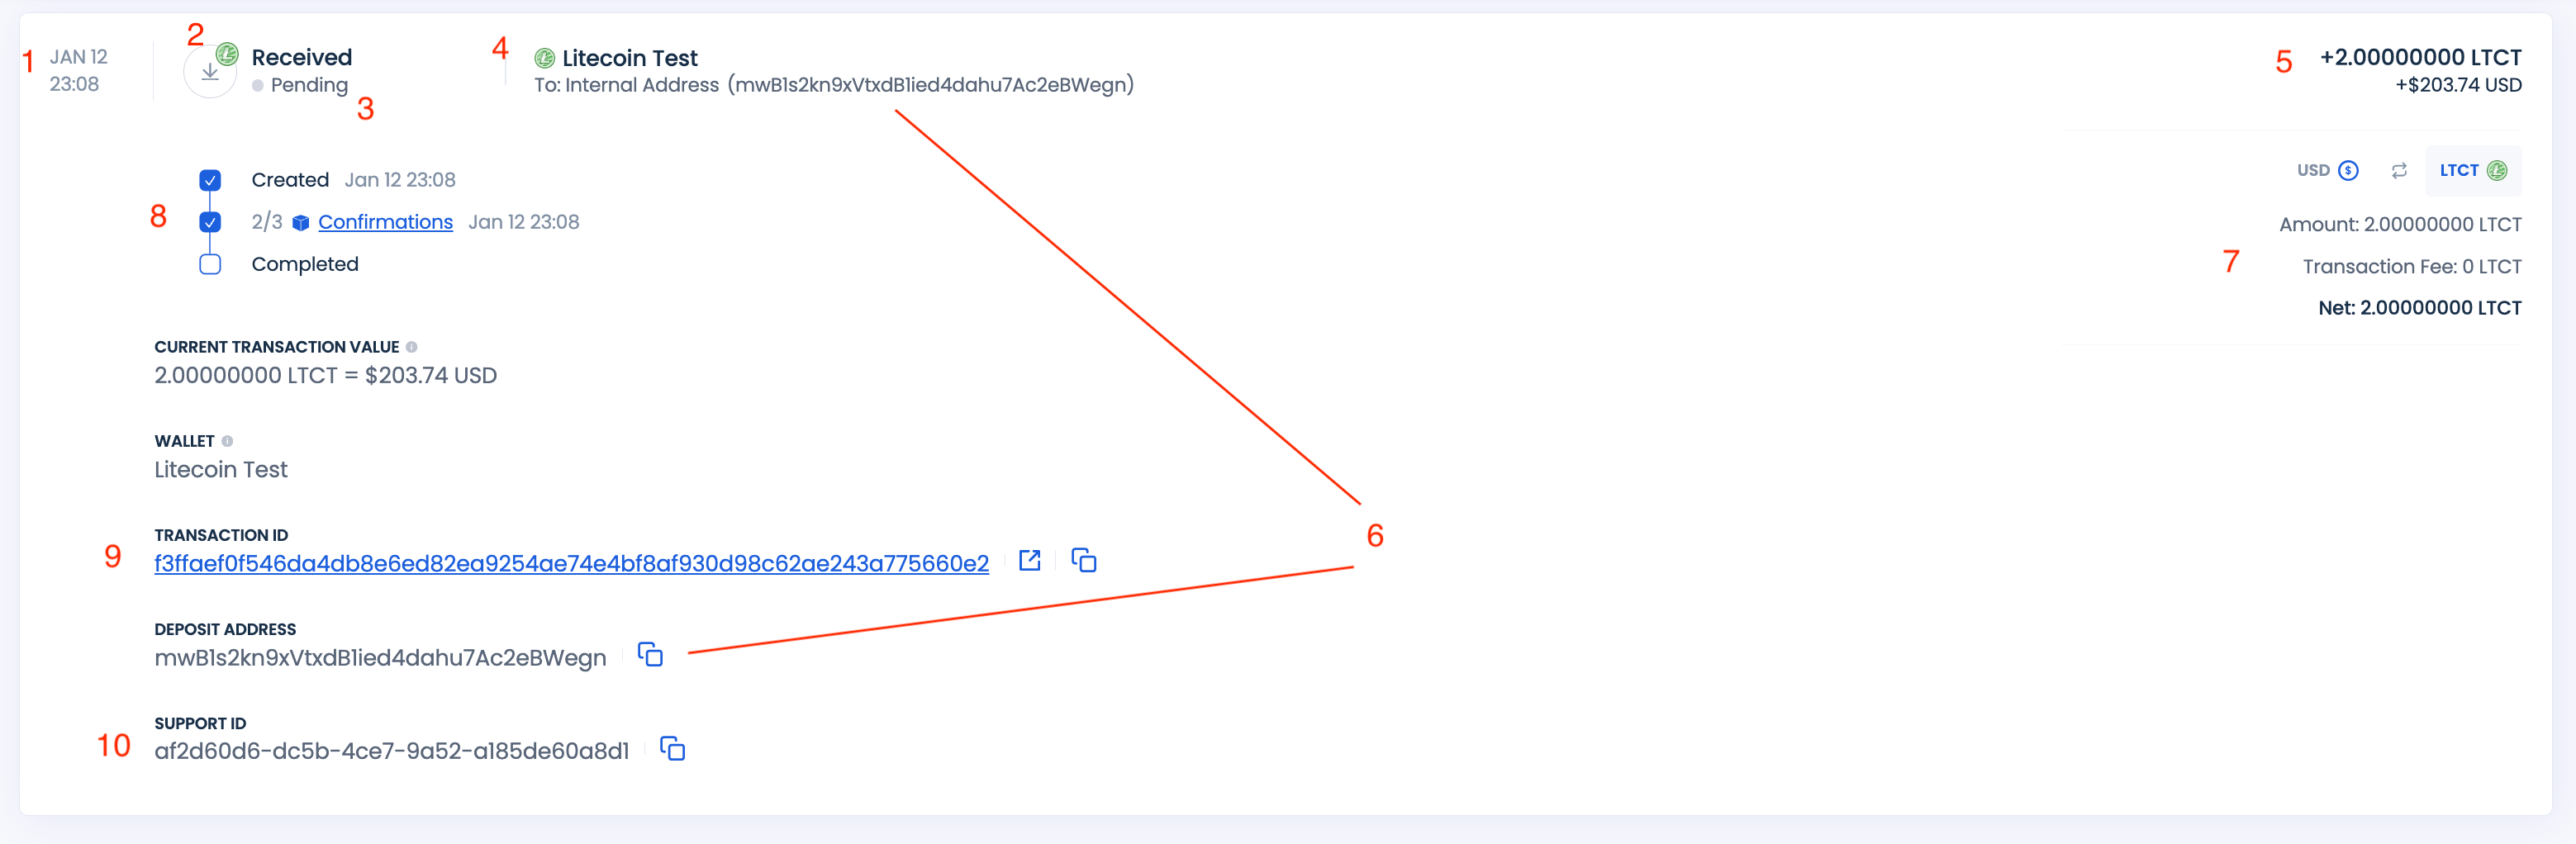
Details Available for Each Transaction
The Transaction History provides detailed information for every transaction, including:
- Transaction date.
- Transaction type (e.g., received, sent, conversion, etc.).
- Transaction status.
- Currency involved, including source and destination currencies in case conversion is involved
- Transaction amount in both crypto and fiat currencies.
- Address or wallet where the transaction was sent or received.
- Breakdown of the transaction amount, including gross, net, and fees (in both crypto and fiat currencies).
- Transaction progress, including confirmations on the blockchain.
- Blockchain transaction ID.
- Support ID for addressing issues with the CoinPayments Support team.
Transaction Status Descriptions
Each transaction type has specific statuses that provide updates on its progress:
Received:
- Created: Transaction is initiated by the customer and detected on the blockchain by CoinPayments.
- Confirmations: Indicates the number of confirmations received on the blockchain. Funds are deposited only after full confirmation.
- Completed: Transaction has the required confirmations, and funds are deposited into your wallet.
Sent:
- Created: Transaction is initiated and sent to the recipient (internal or external).
- Completed: For internal transactions, funds are deposited into the destination wallet; for external transactions, funds are placed on the blockchain and tracked until full confirmation.
Conversion:
- Created: Transaction is initiated by you for conversion.
- Funds Sent: Transaction is put on the blockchain to be sent to a 3rd party converter
- Funds Converted: Funds converted. Deposit in the destination currency is expected to be put on blockchain
- Funds Transferred: Incoming funds are detected on the blockchain.
- Conversion Completed: Funds deposited to your balance.
Invoice/Payment:
- Created: Payment for goods/services is initiated and detected on the blockchain.
- Confirmations: Indicates the number of confirmations the transaction has received on the blockchain. When transaction has received the required number of confirmations, it means that Coinpayments has received the funds and is planning the payout to your wallet/address depending on the payout mode selected for this specific currency in your Payment Settings.
- Payout Scheduled – Coinpayments has scheduled the payout of funds to your wallet balance based on your Payment Settings for the specific currency.
- Converting – Funds are being converted if the selected payout mode includes conversion.
- Sent to you – Converted funds are sent to the final destination wallet.
- Completed – Funds are either deposited to internal wallets after completing all blockchain confirmations or are sent to external addresses.
Export Transaction History:
You can export transaction history to your device to manipulate the records locally for your accounting purposes. To export history click Export.

The history will be downloaded to your device in the .csv format.
You can filter out the records that you want to download by applying filters by date.

Webhook History
The Webhook History feature allows you to review all webhook notifications for all integrations, wallets and addresses for which webhook url has been provided. This includes deposits, withdrawals, conversions and payments made for buttons created via API and invoices created via API or e-commerce integrations.
To access the feature in the main dashboard menu navigate to Integrations > Webhook History.

Transaction Types
CoinPayments Webhook History tracks notifications for the following types of transactions:
- Received, Sent, Conversion: transactions sent from/to API wallets/addresses. You can provide a url for the wallet or for a specific address within the wallet. In case you set up a url for an address, it overrides the url set up for the wallet where the address belongs.
- Invoice: Payments for invoices created using the API or e-commerce integration.
- Payment: Payments made via payment buttons generated via API integration.
Details Available for Each Notification
The Webhook History provides detailed information for every transaction, including:
- Webhook notification date and time.
- Transaction type (e.g., received, sent, conversion, invoice, payment).
- Transaction amount and currency.
- Transaction status.
- Webhook notification status.
- Time when the notification was sent and number of tries to reach the webhook URL
- Transaction support ID with the CoinPayments system.
- Integration name under which transaction is performed.
- Webhook URL.
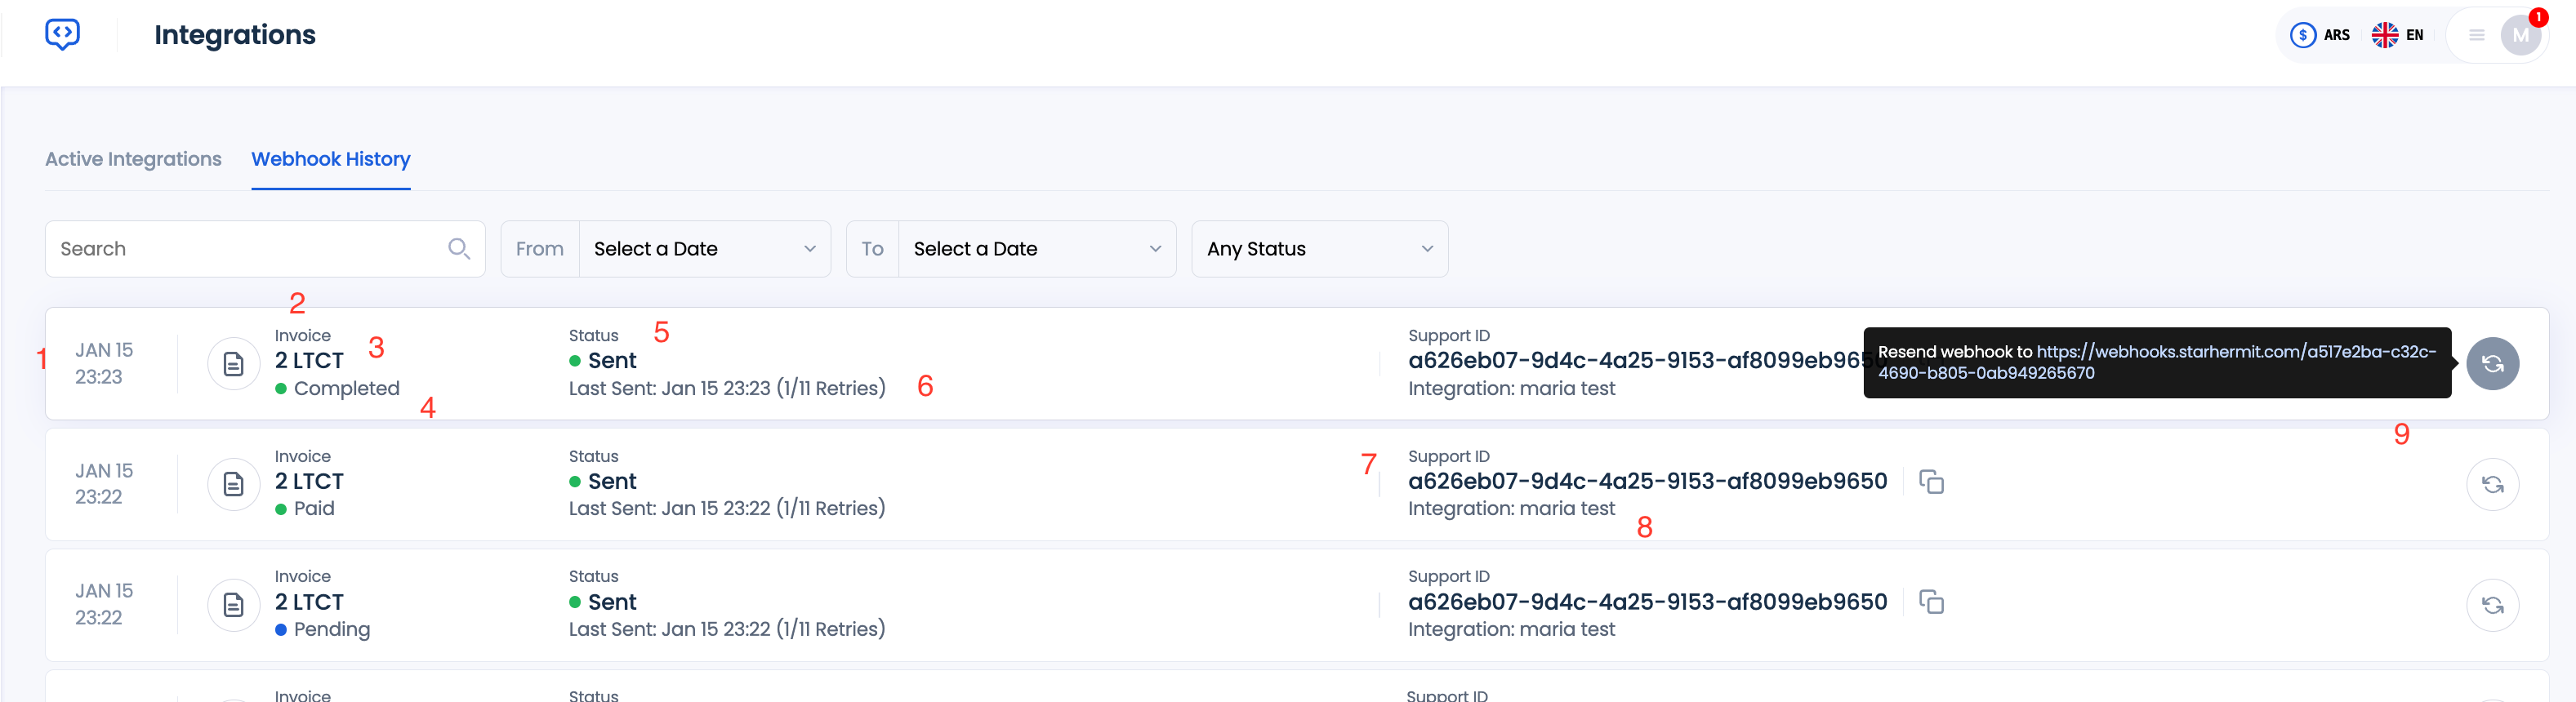
Webhook Notification Status Descriptions
Webhook notifications have the following statuses that provide updates on their progress:
- Sent – webhook notification successfully delivered to the webhook URL
- Failed – webhook notification failed to be delivered to the webhook URL and all the retries are expired
- NOTE: CoinPayments takes 10 tries to deliver the webhook notification to the specified URL. In case automatic delivery fails, the notification status is set to failed. You can still resend the notification manually by using the retry button.
- Retrying – webhook notification is being delivered to the webhook URL. CoinPayments is retrying to deliver the notification to the webhook URL
Setting up Webhook Notifications
Via Dashboard UI
You can set up webhook notifications for invoices via CoinPayments Dashboard UI.
NOTE: The URL that will be provided in the Dashboard UI will be the default URL for all invoices created via API unless overwritten for a specific invoice. Invoices created via Invoice Builder do not support webhook notifications.
- Go to Integrations.
- Select the integration for which you want to set up notifications.
- Enter the URL for sending webhooks into the Webhook URL field
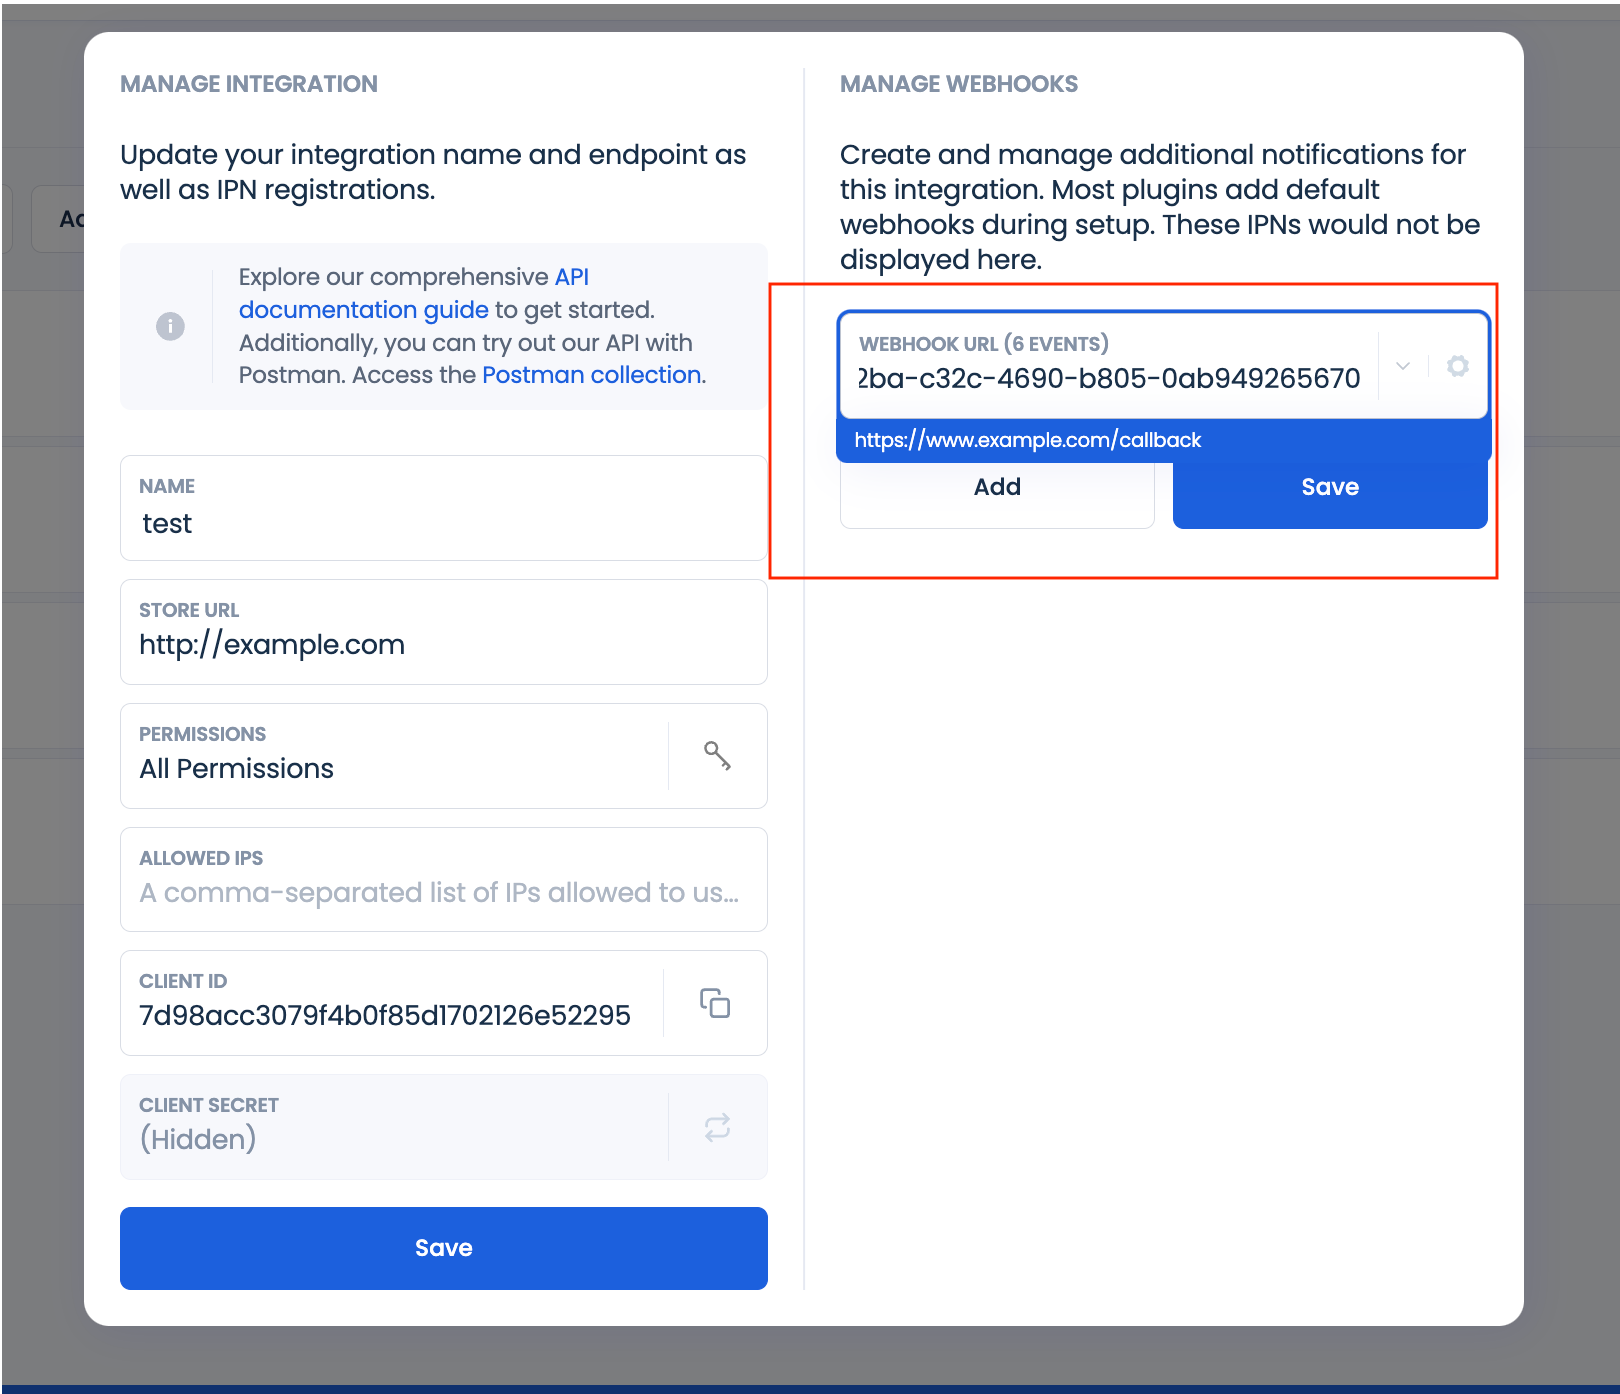
- You can add as many links as you want by clicking Add button.
- Click on the Settings button. Select the notification types you want to receive
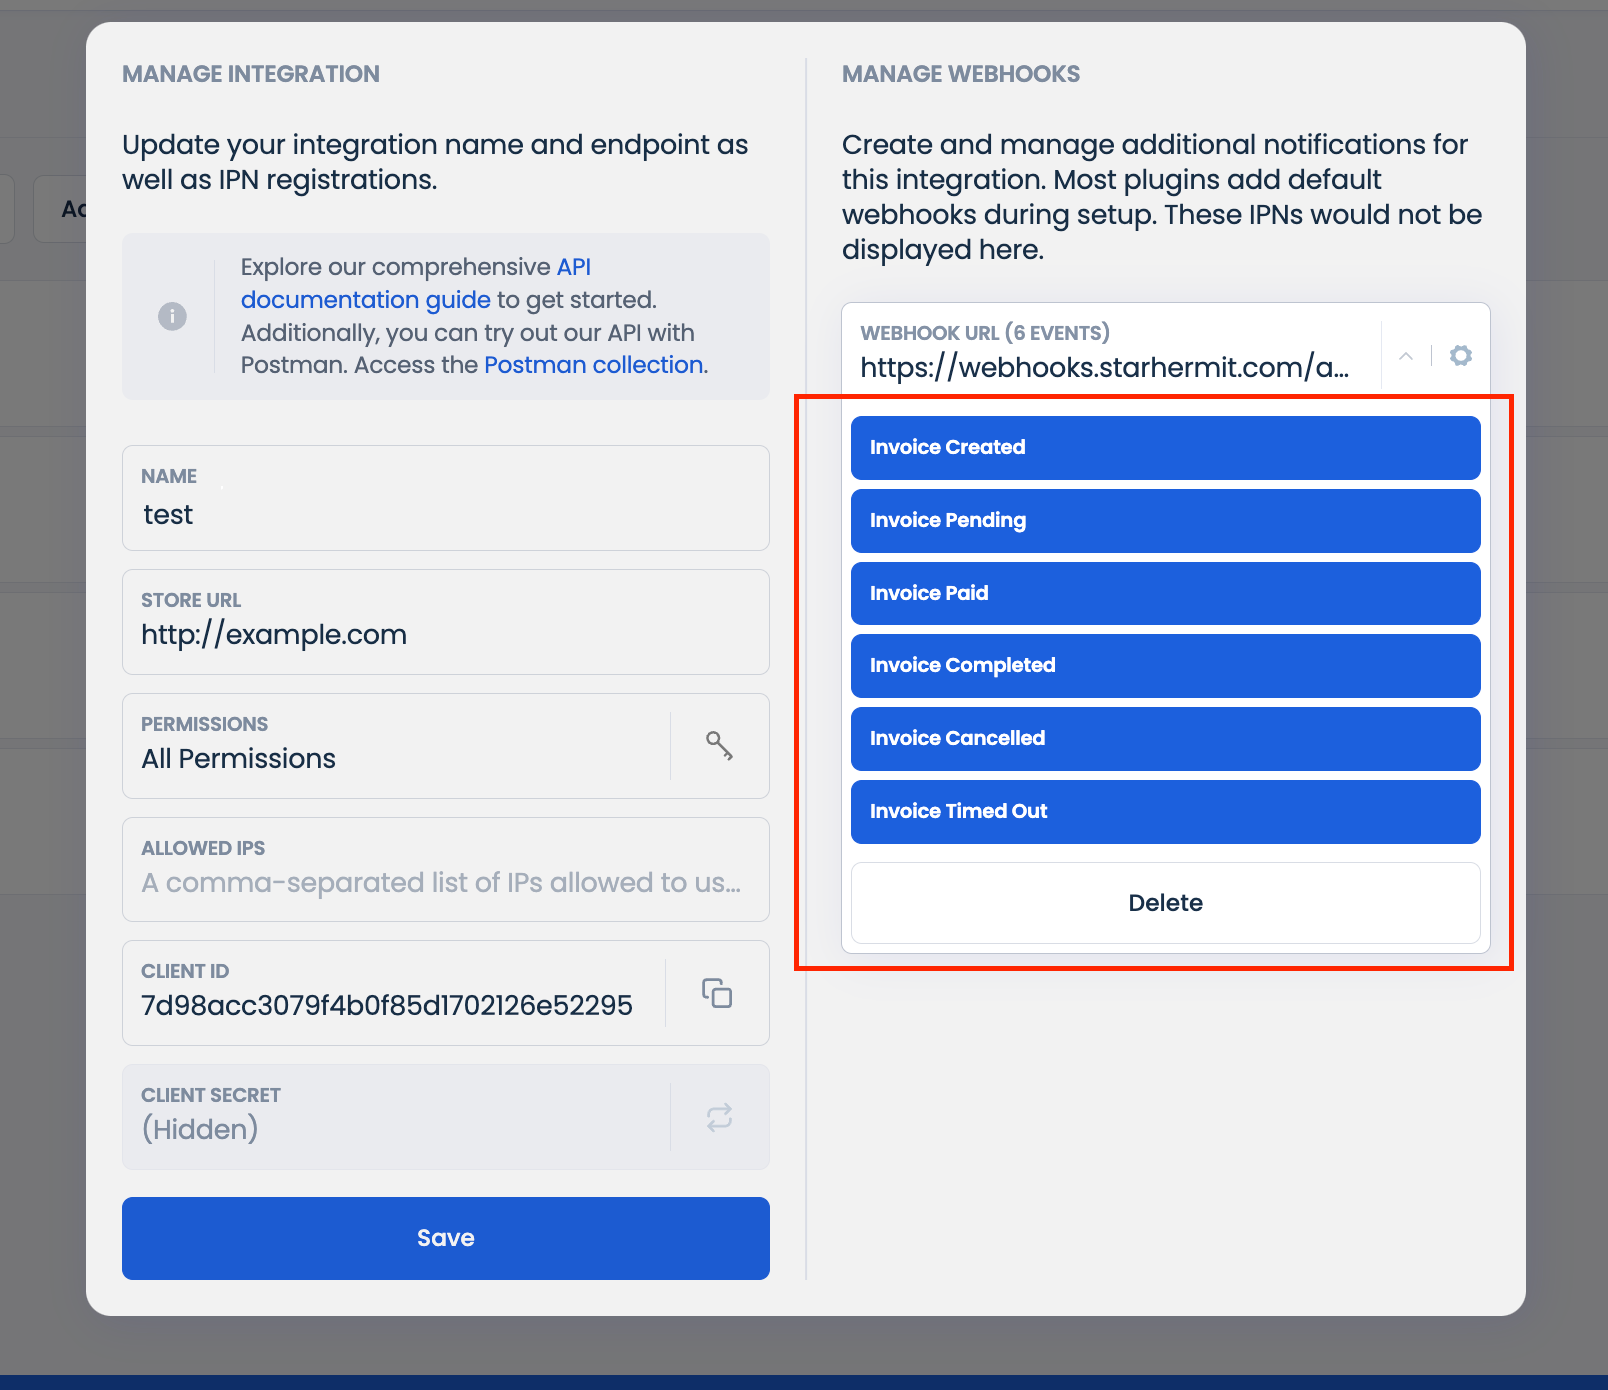
- Then click Save.
Via API
You can set up webhook notification via API when creating invoices, wallets and addresses.
For invoices, use `webhooks` object in the `createInvoice` endpoint request.
Url provided for a specific invoice overrides the default webhook notification URL set up via Dashboard UI.
For wallets, use `webhookUrl` attribute in the `createWallet` endpoint request.
Notifications for all transactions within the wallet will be sent to this address.
You can specify a webhook URL at the address level. For this use `notificationUrl` attribute in the `createAddress` endpoint request. Notifications for all transactions associated with the address will be sent to this URL. This URL overrides the webhook URL set up at the wallet level where the address belongs.
Ready to Move on to the Next Step?
Click here to go to Step 4: Testing Your CoinPayments Integration